11.4. Using ExSite
To generate an MG or CE library, a number of modules have to be run in sequence. Some information from the ENDF evaluation is needed before preparing the input files. For example, some modules are only run if the evaluation contains unresolved resonance data. For thermal evaluation one or more evaluations need to be designated as fast evaluations. While this can be done by the user on a per evaluation basis, it is easier to generate all the information automatically. The program ExSite helps the user in collecting needed information from the ENDF evaluations and generates the input files. In addition ExSite allows the user the flexibility to edit the input for individual modules.
In generating input files ExSite uses two XML-formatted files that can be automatically generated from user selected ENDF tapes. The first file contains information that is automatically extracted from the ENDF tapes. The second file is a configuration file containing information about which fast evaluation(s) are to be combined with a given thermal evaluation and nuclides that need a special ID if the library is to be used with SCALE. The second file is also automatically produced, but the user must review the information before actually using the file. Please note that the ID values for metastable nuclides and evaluations containing thermal moderators have changed between SCALE 6.1 and SCALE 6.2. ExSite tries to automatically generate SCALE 6.2 ID values. A detailed description of the content of the two files can be found in Sect. 11.8 This section focuses on the use of ExSite.
11.4.1. Create an XML Listing
The user must first select “Read new ENDF data” from the “Ampx” menu. See Fig. 11.4.1 for details. This will open a wizard to guide the user through the selection of the ENDF tapes. The wizard has three steps:
The user selects the ENDF tapes to be parsed. The window is shown in Fig. 11.4.2. More files can be added by pressing the “Add” button, which opens a file dialog as shown in Fig. 11.4.2. The list of added files can be reviewed, and any unwanted files can be removed. The “Remove” button becomes active when one or more file names are selected.
In the next step, the selected files will be parsed, as shown in Fig. 11.4.3. The “Next” button becomes available when all ENDF tapes are parsed. If an error occurs, it will be printed on the screen, and the “Next” button will not be enabled.
The final step is to select the output file. The wizard window is shown in Fig. 11.4.4. The “Select Output” button will open a file dialog, allowing the user to select the file name for the ENDF listing. If any of the ENDF tapes selected contains metastable nuclides or a thermal evaluation, the text shown in Fig. 11.4.4 will be displayed. In this case, the user should review the configuration file to make sure the correct ID values are chosen.
The ENDF listing generated by the wizard can now be used for expanding templates.
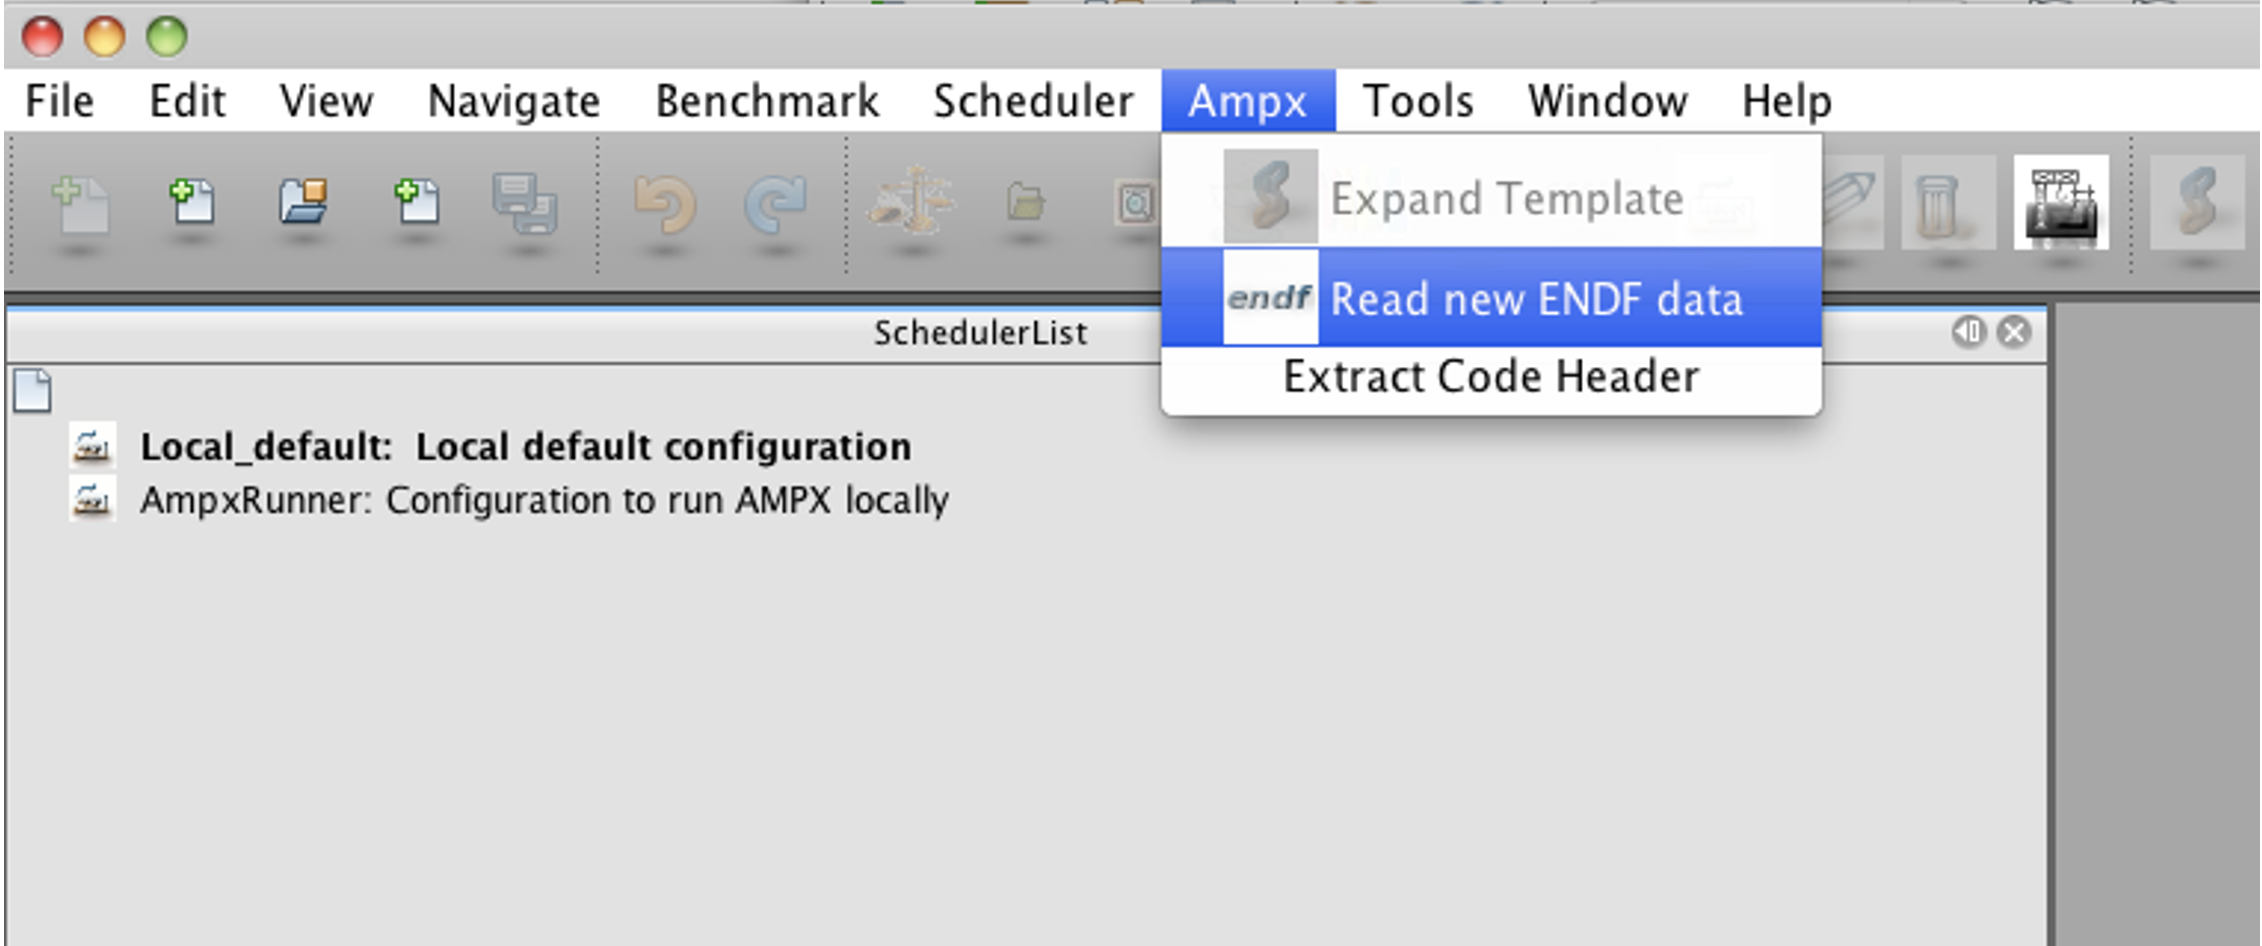
Fig. 11.4.1 Start reading abbreviated ENDF tapes.
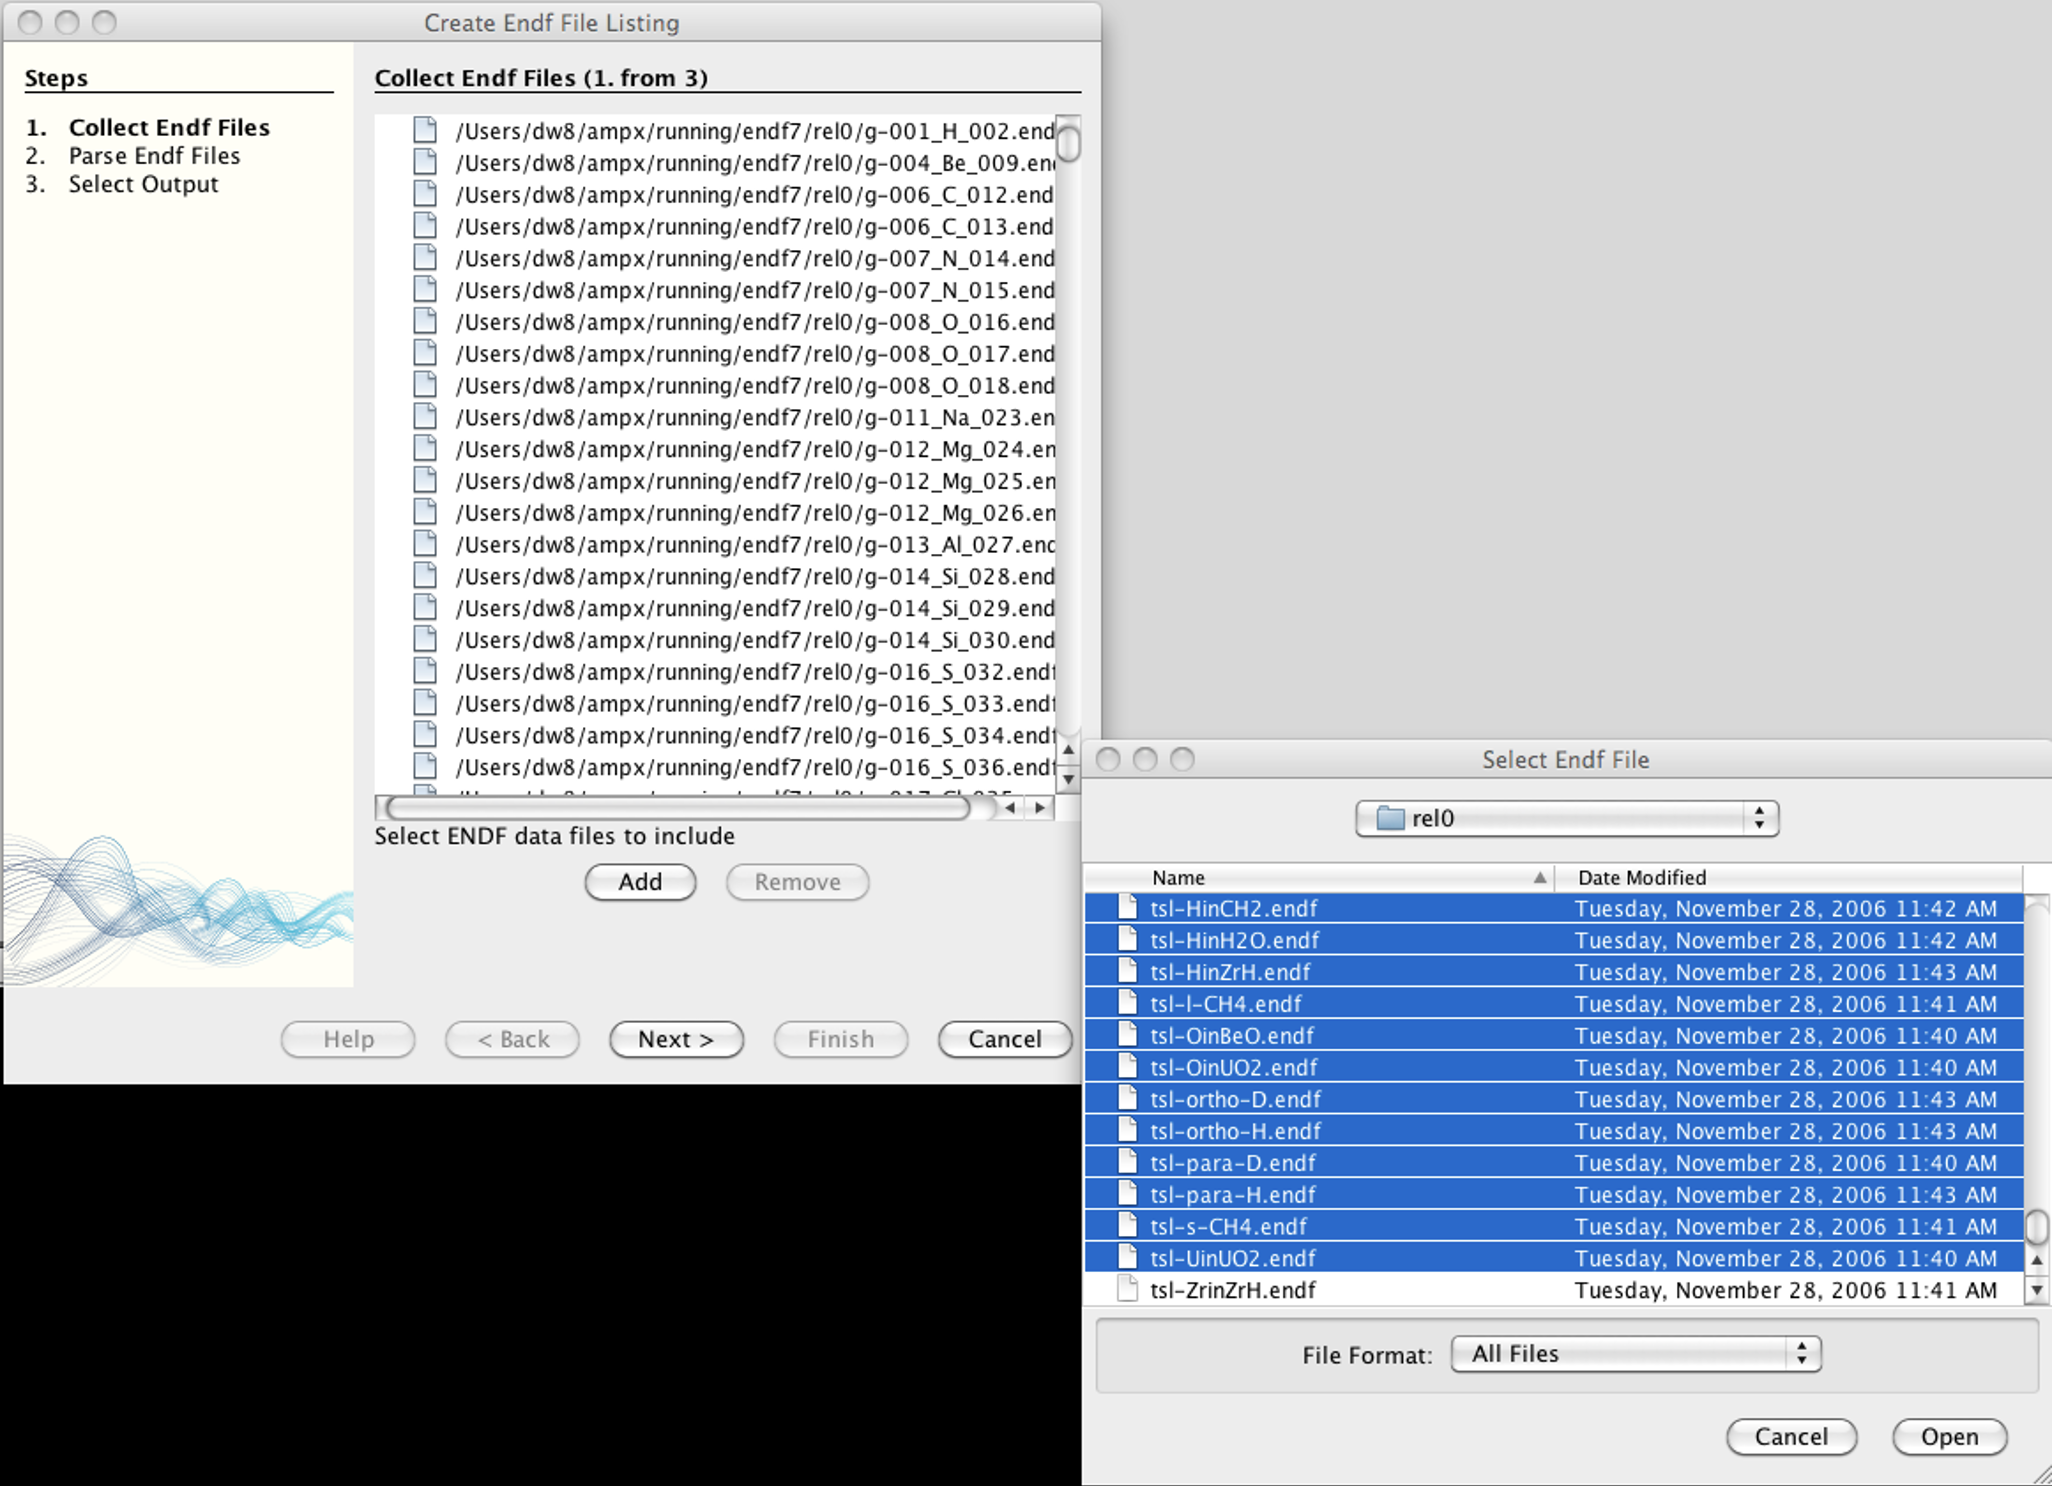
Fig. 11.4.2 Select the ENDF tapes from which to create the listing.
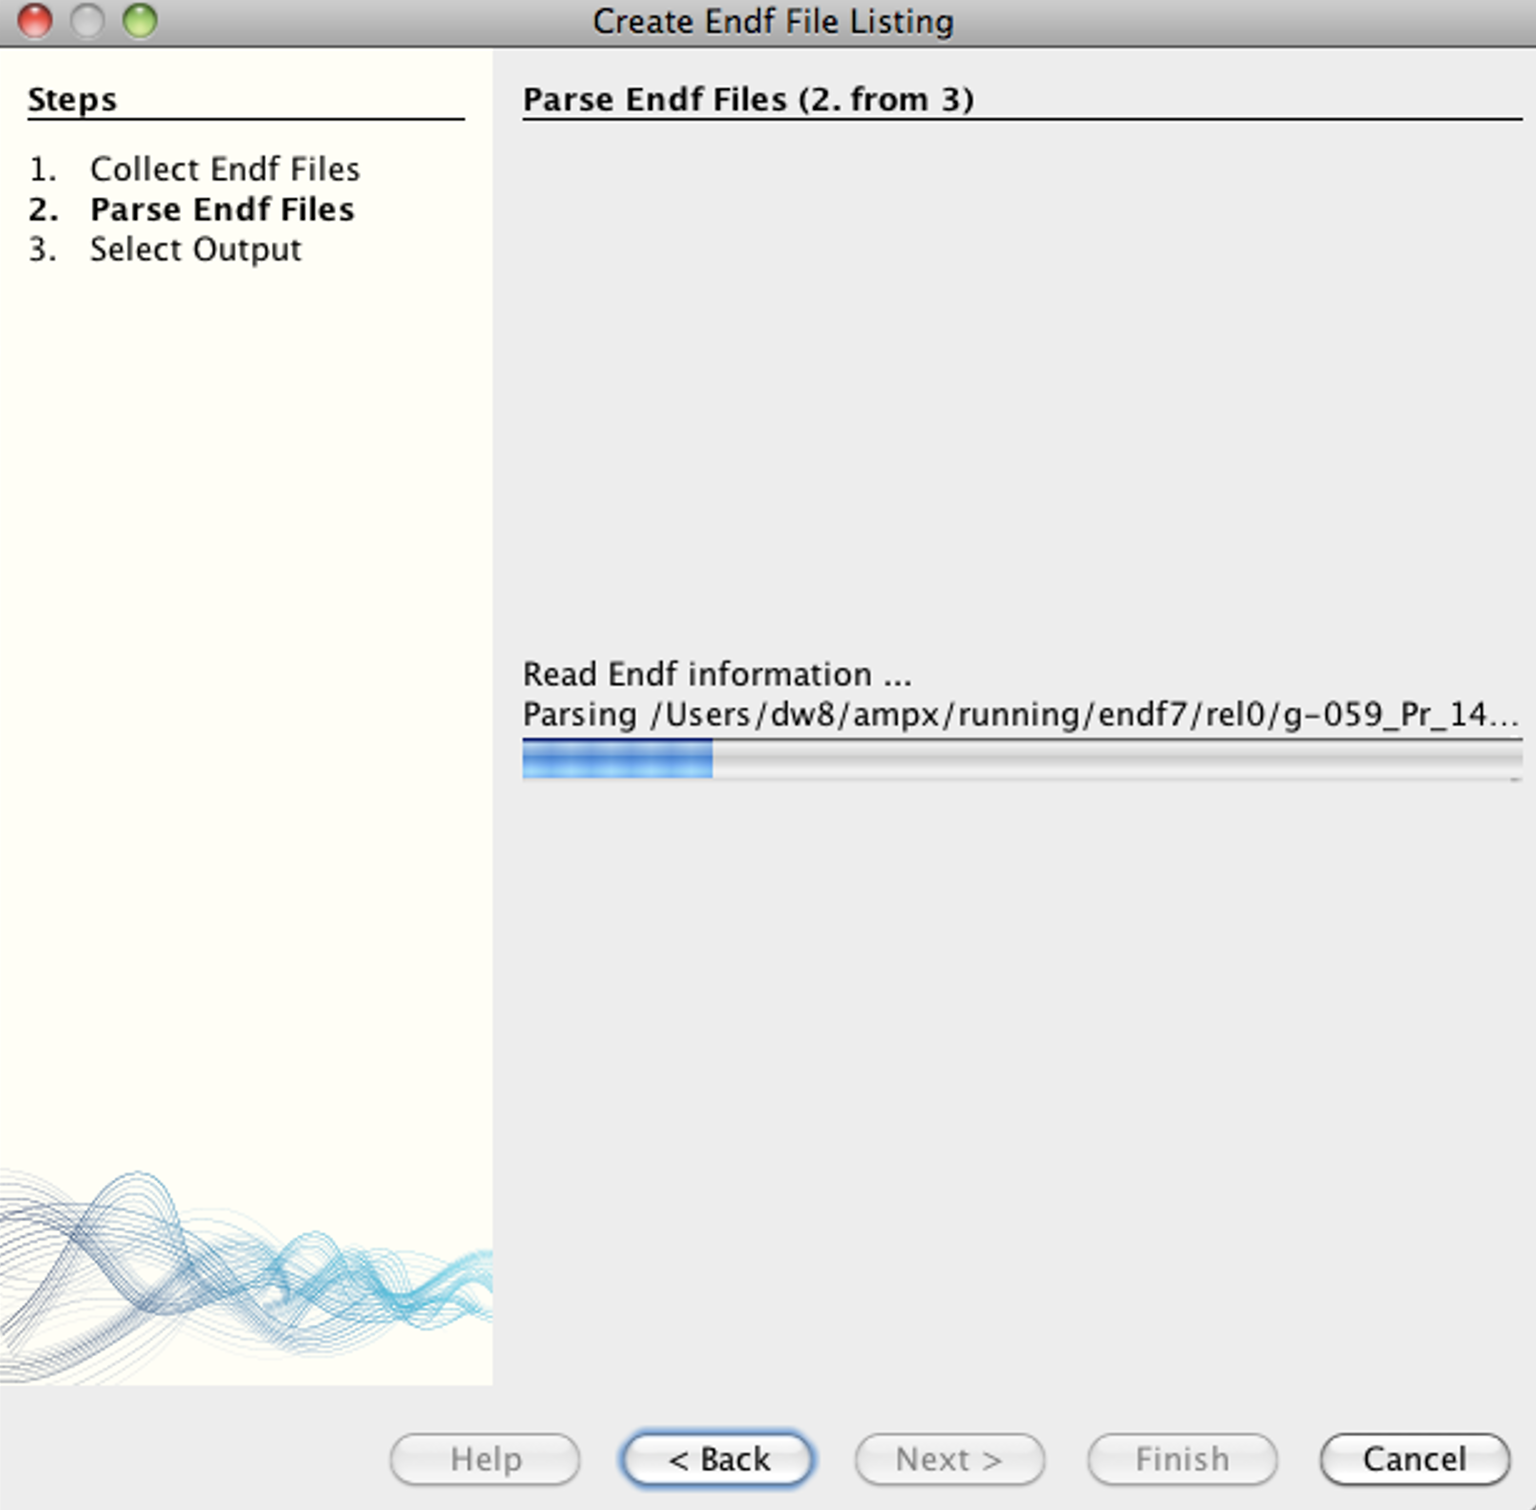
Fig. 11.4.3 Progress bar to indicate that ENDF tapes are being parsed.
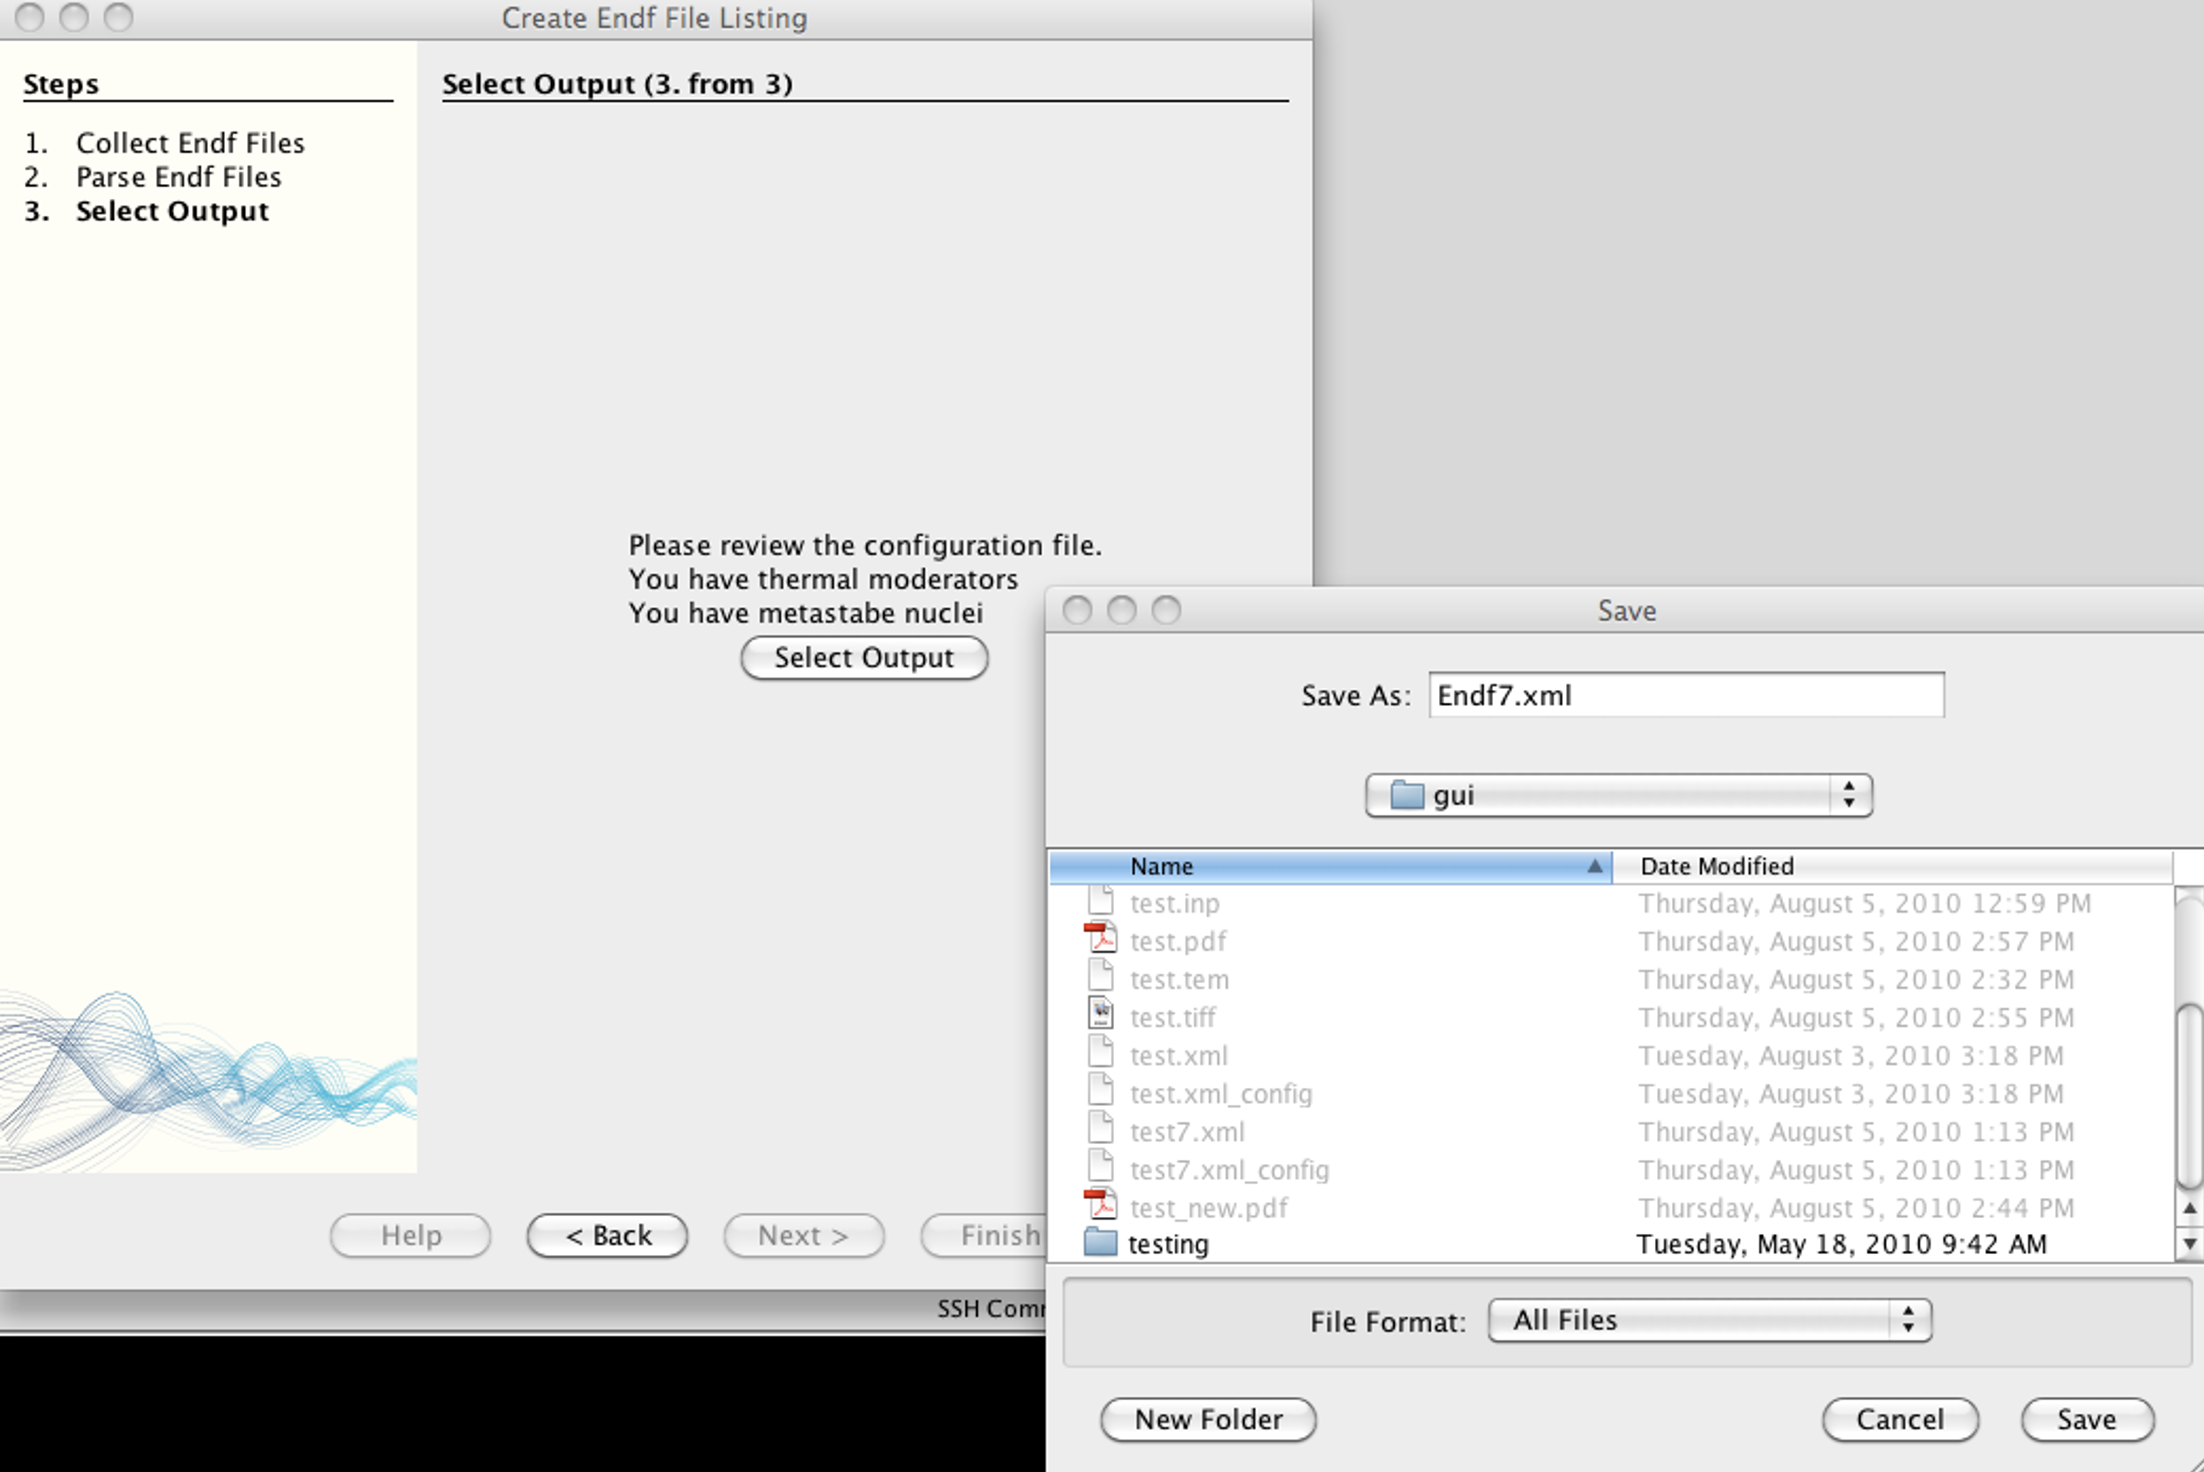
Fig. 11.4.4 Select the output for the ENDF listing.
11.4.2. Using Templates
ExSite is used to generate input files by combining templates and ENDF listings.
Templates to generate the major types of libraries are included with ExSite. In
addition, users can add custom templates. In order to use templates, select “New
Template File” from the “File” menu, or open an existing template file by
selecting “Open File” from the “File” menu. Template files have an extension of
tem. After opening the file, a palette appears next to the editor for the
input file. Click on one of the templates and drag it into the editor as shown
in Fig. 11.4.5. Once the mouse is released a dialog appears that allows the user to
enter data relevant to the selected template. The dialog is shown in Fig. 11.4.6. The
xml listing generated in the last section needs to be given under the “evals”
keyword, and the name of the input files generated is listed under the “input”
keyword. Note that the tag name for each evaluation will generally be added to
the name of the input. All file names used in the template are interpreted as
relative to the template file except if absolute file names are used. The
generated input files will use relative file names where possible, except if
“absolute” is selected. After pressing okay, the keyword-based input will appear
in the editor window. The editor window allows the user to alter any of the
wizard-generated input via keyboard input. Selecting “Expand Template” from the
“Ampx” menu or pressing the appropriate button on the toolbar will generate the
input files. See Fig. 11.4.7 for details.
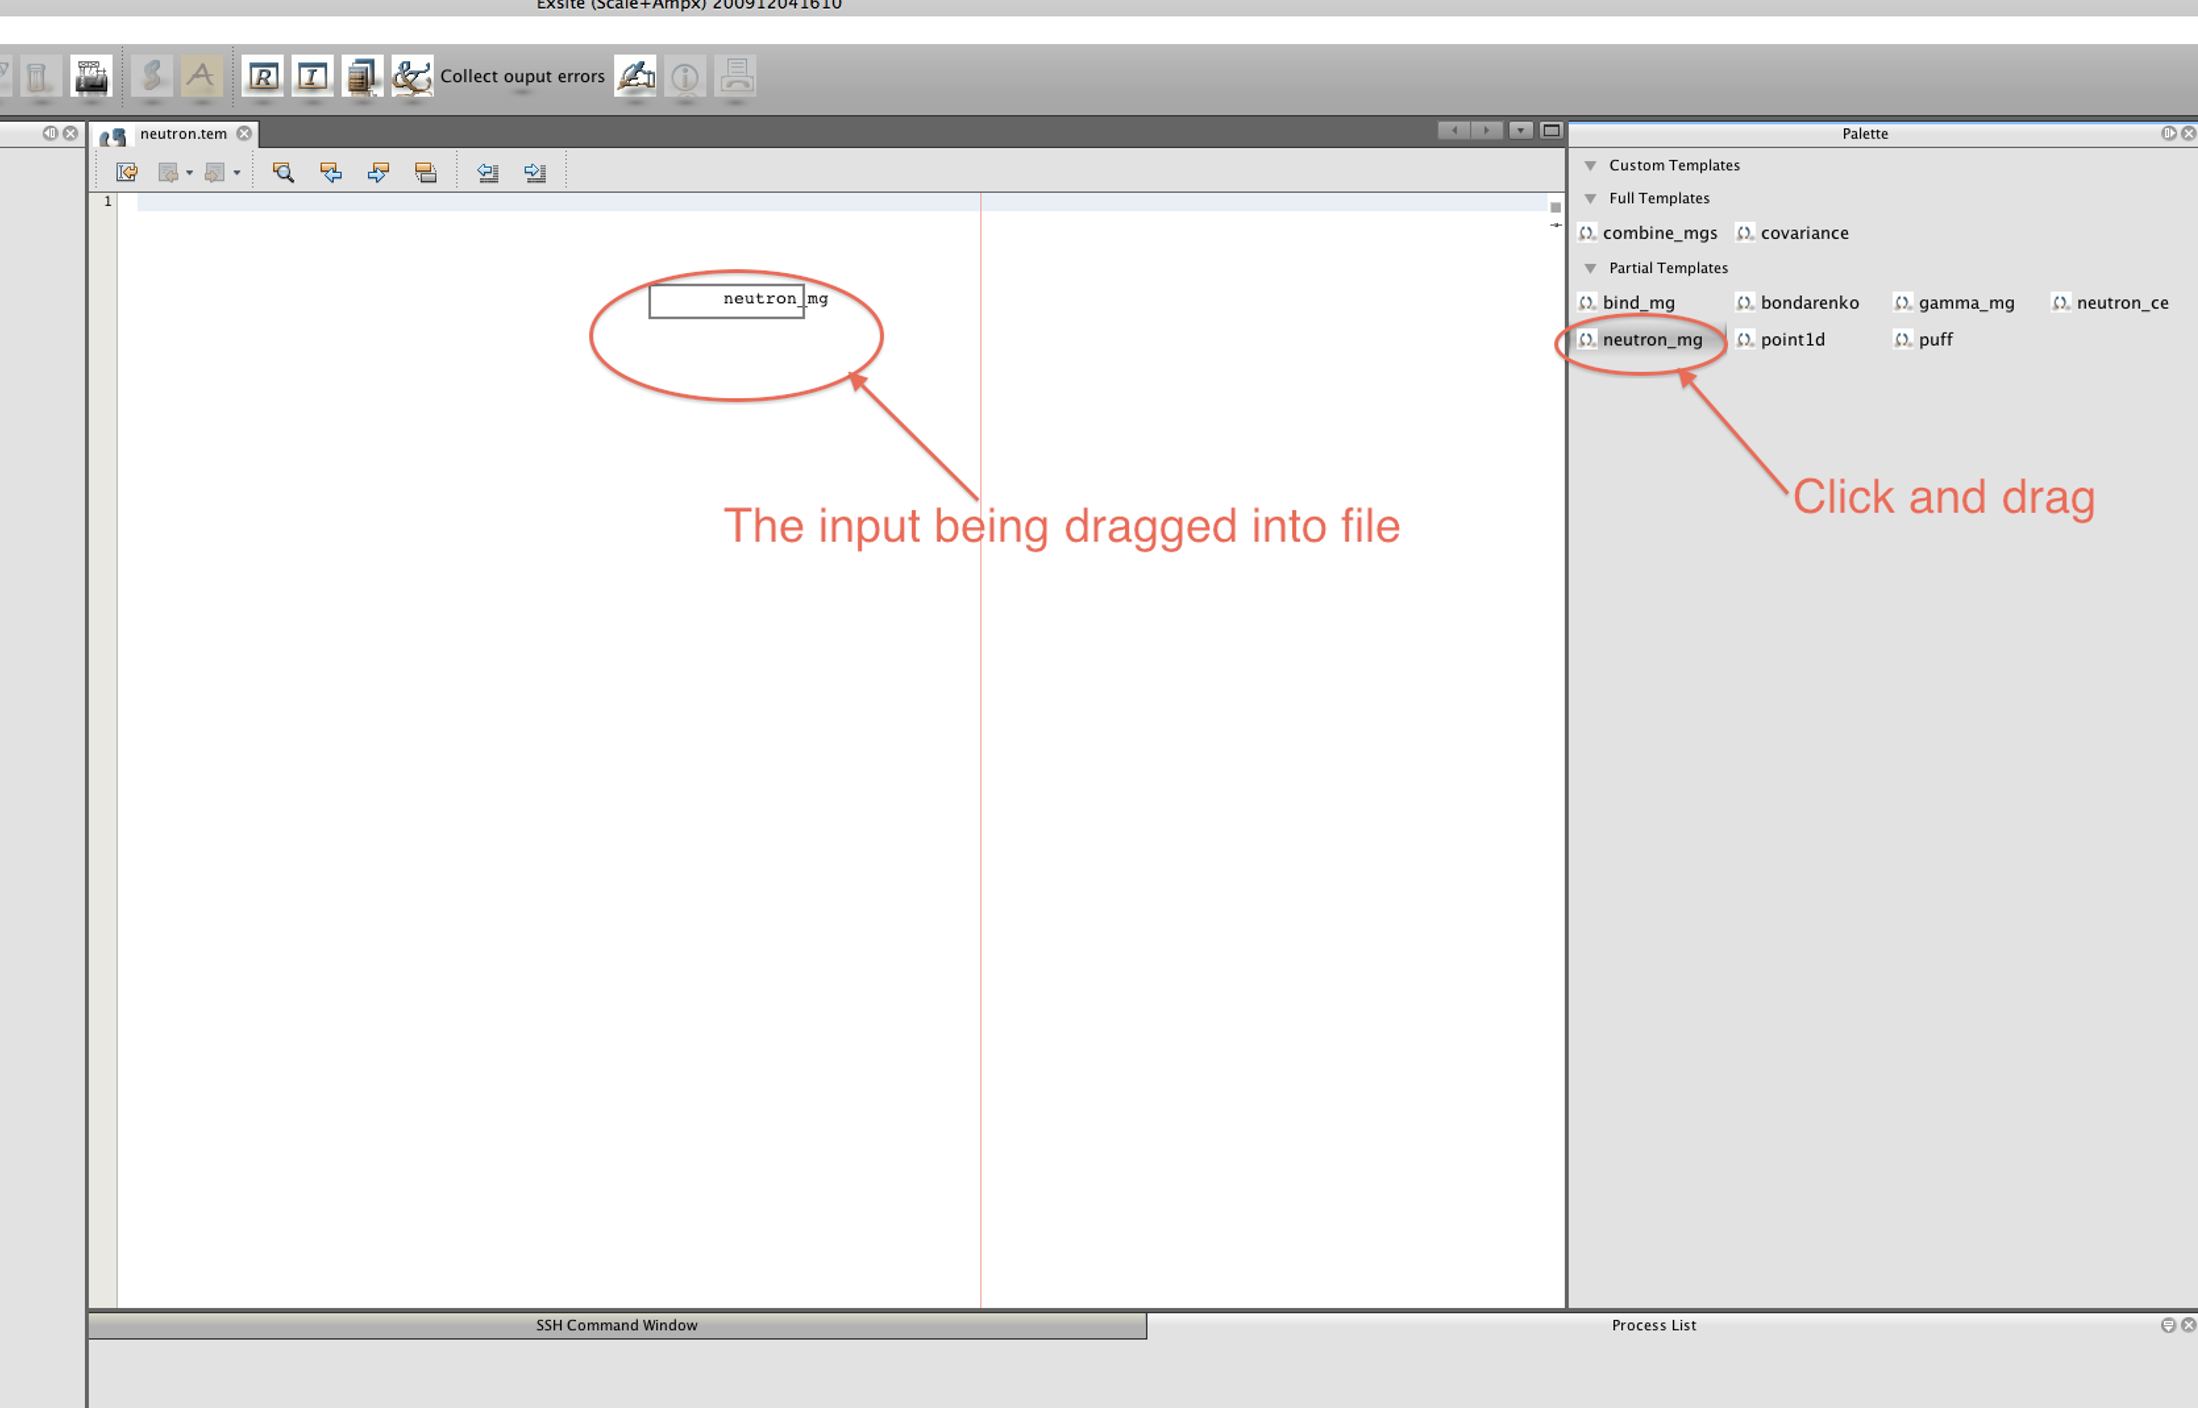
Fig. 11.4.5 Drag a template into an template file.
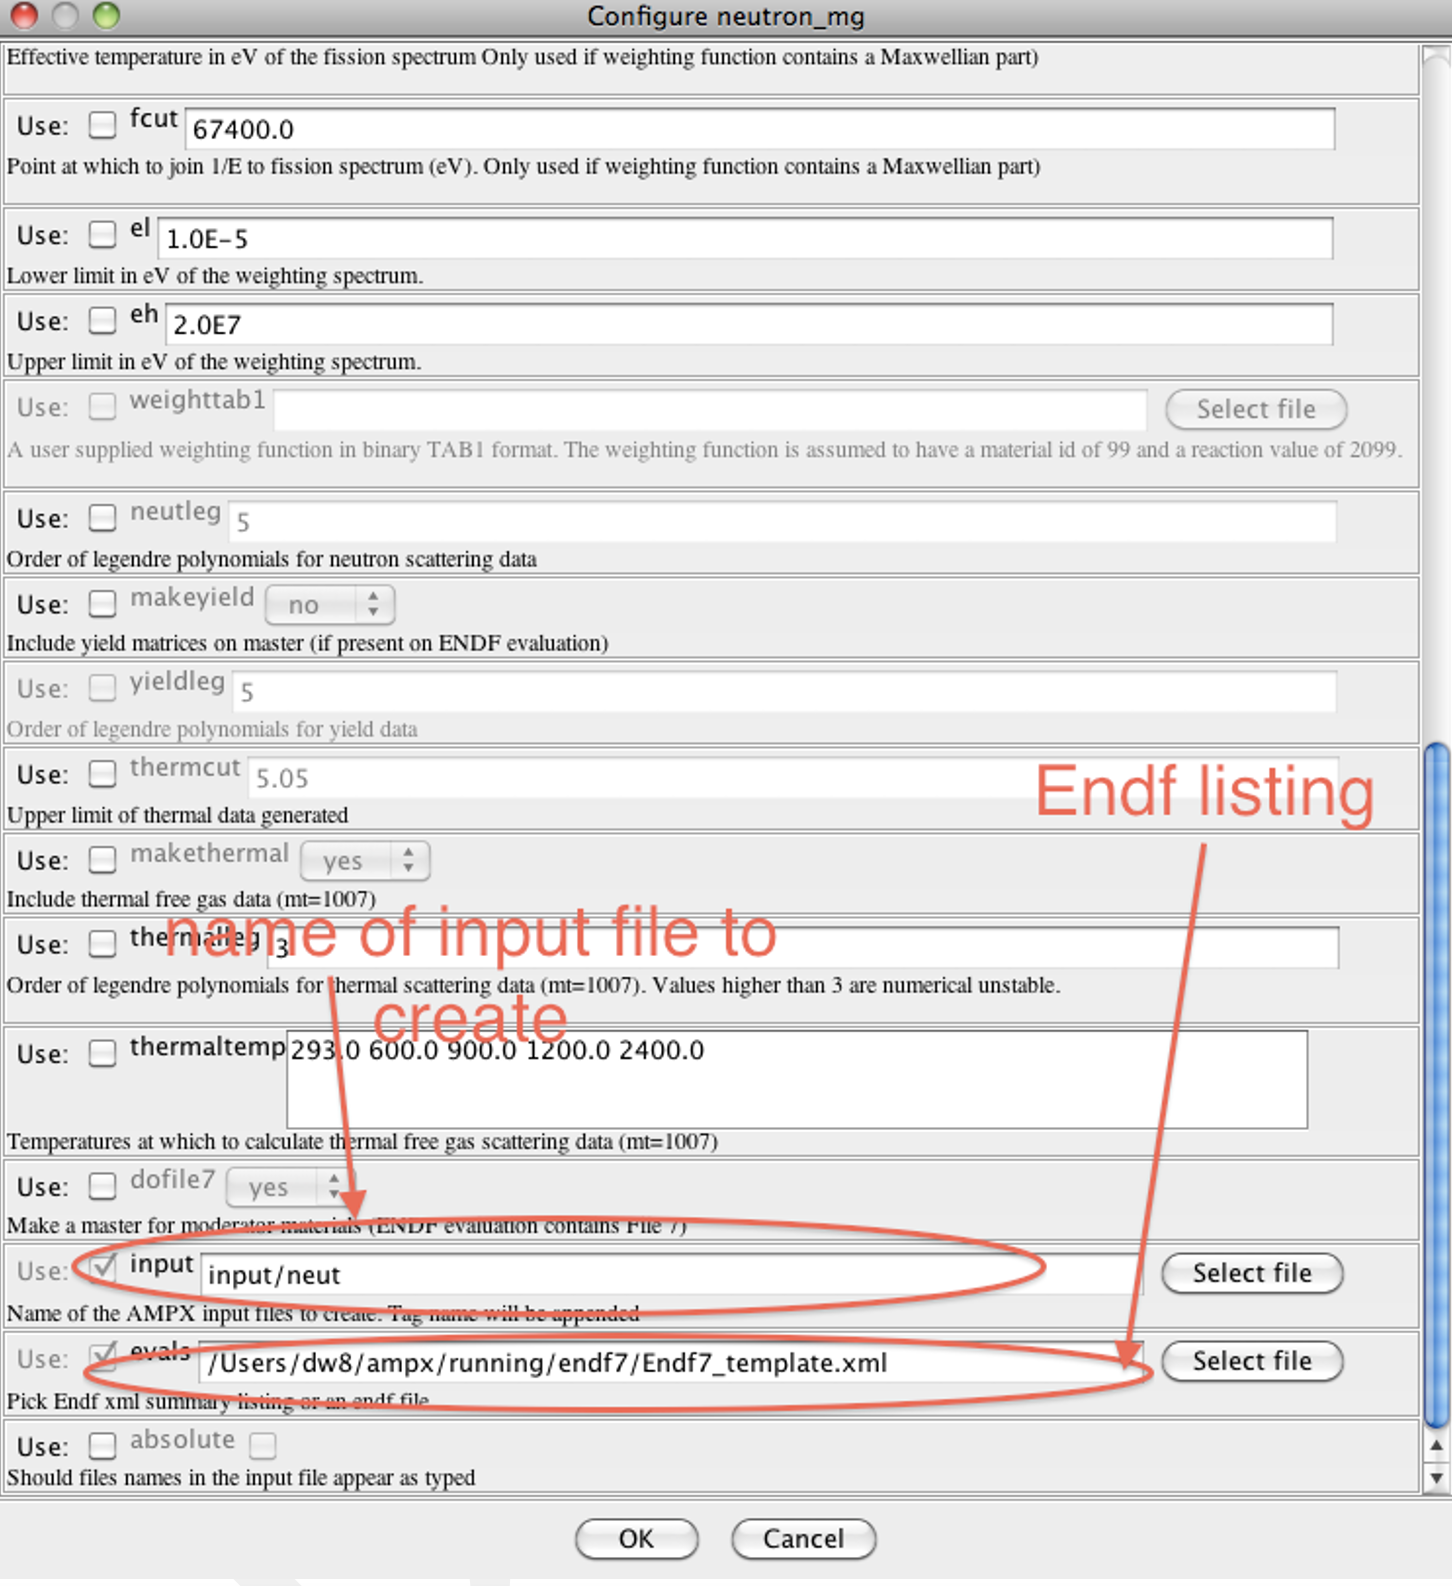
Fig. 11.4.6 Add parameters to create the input files.
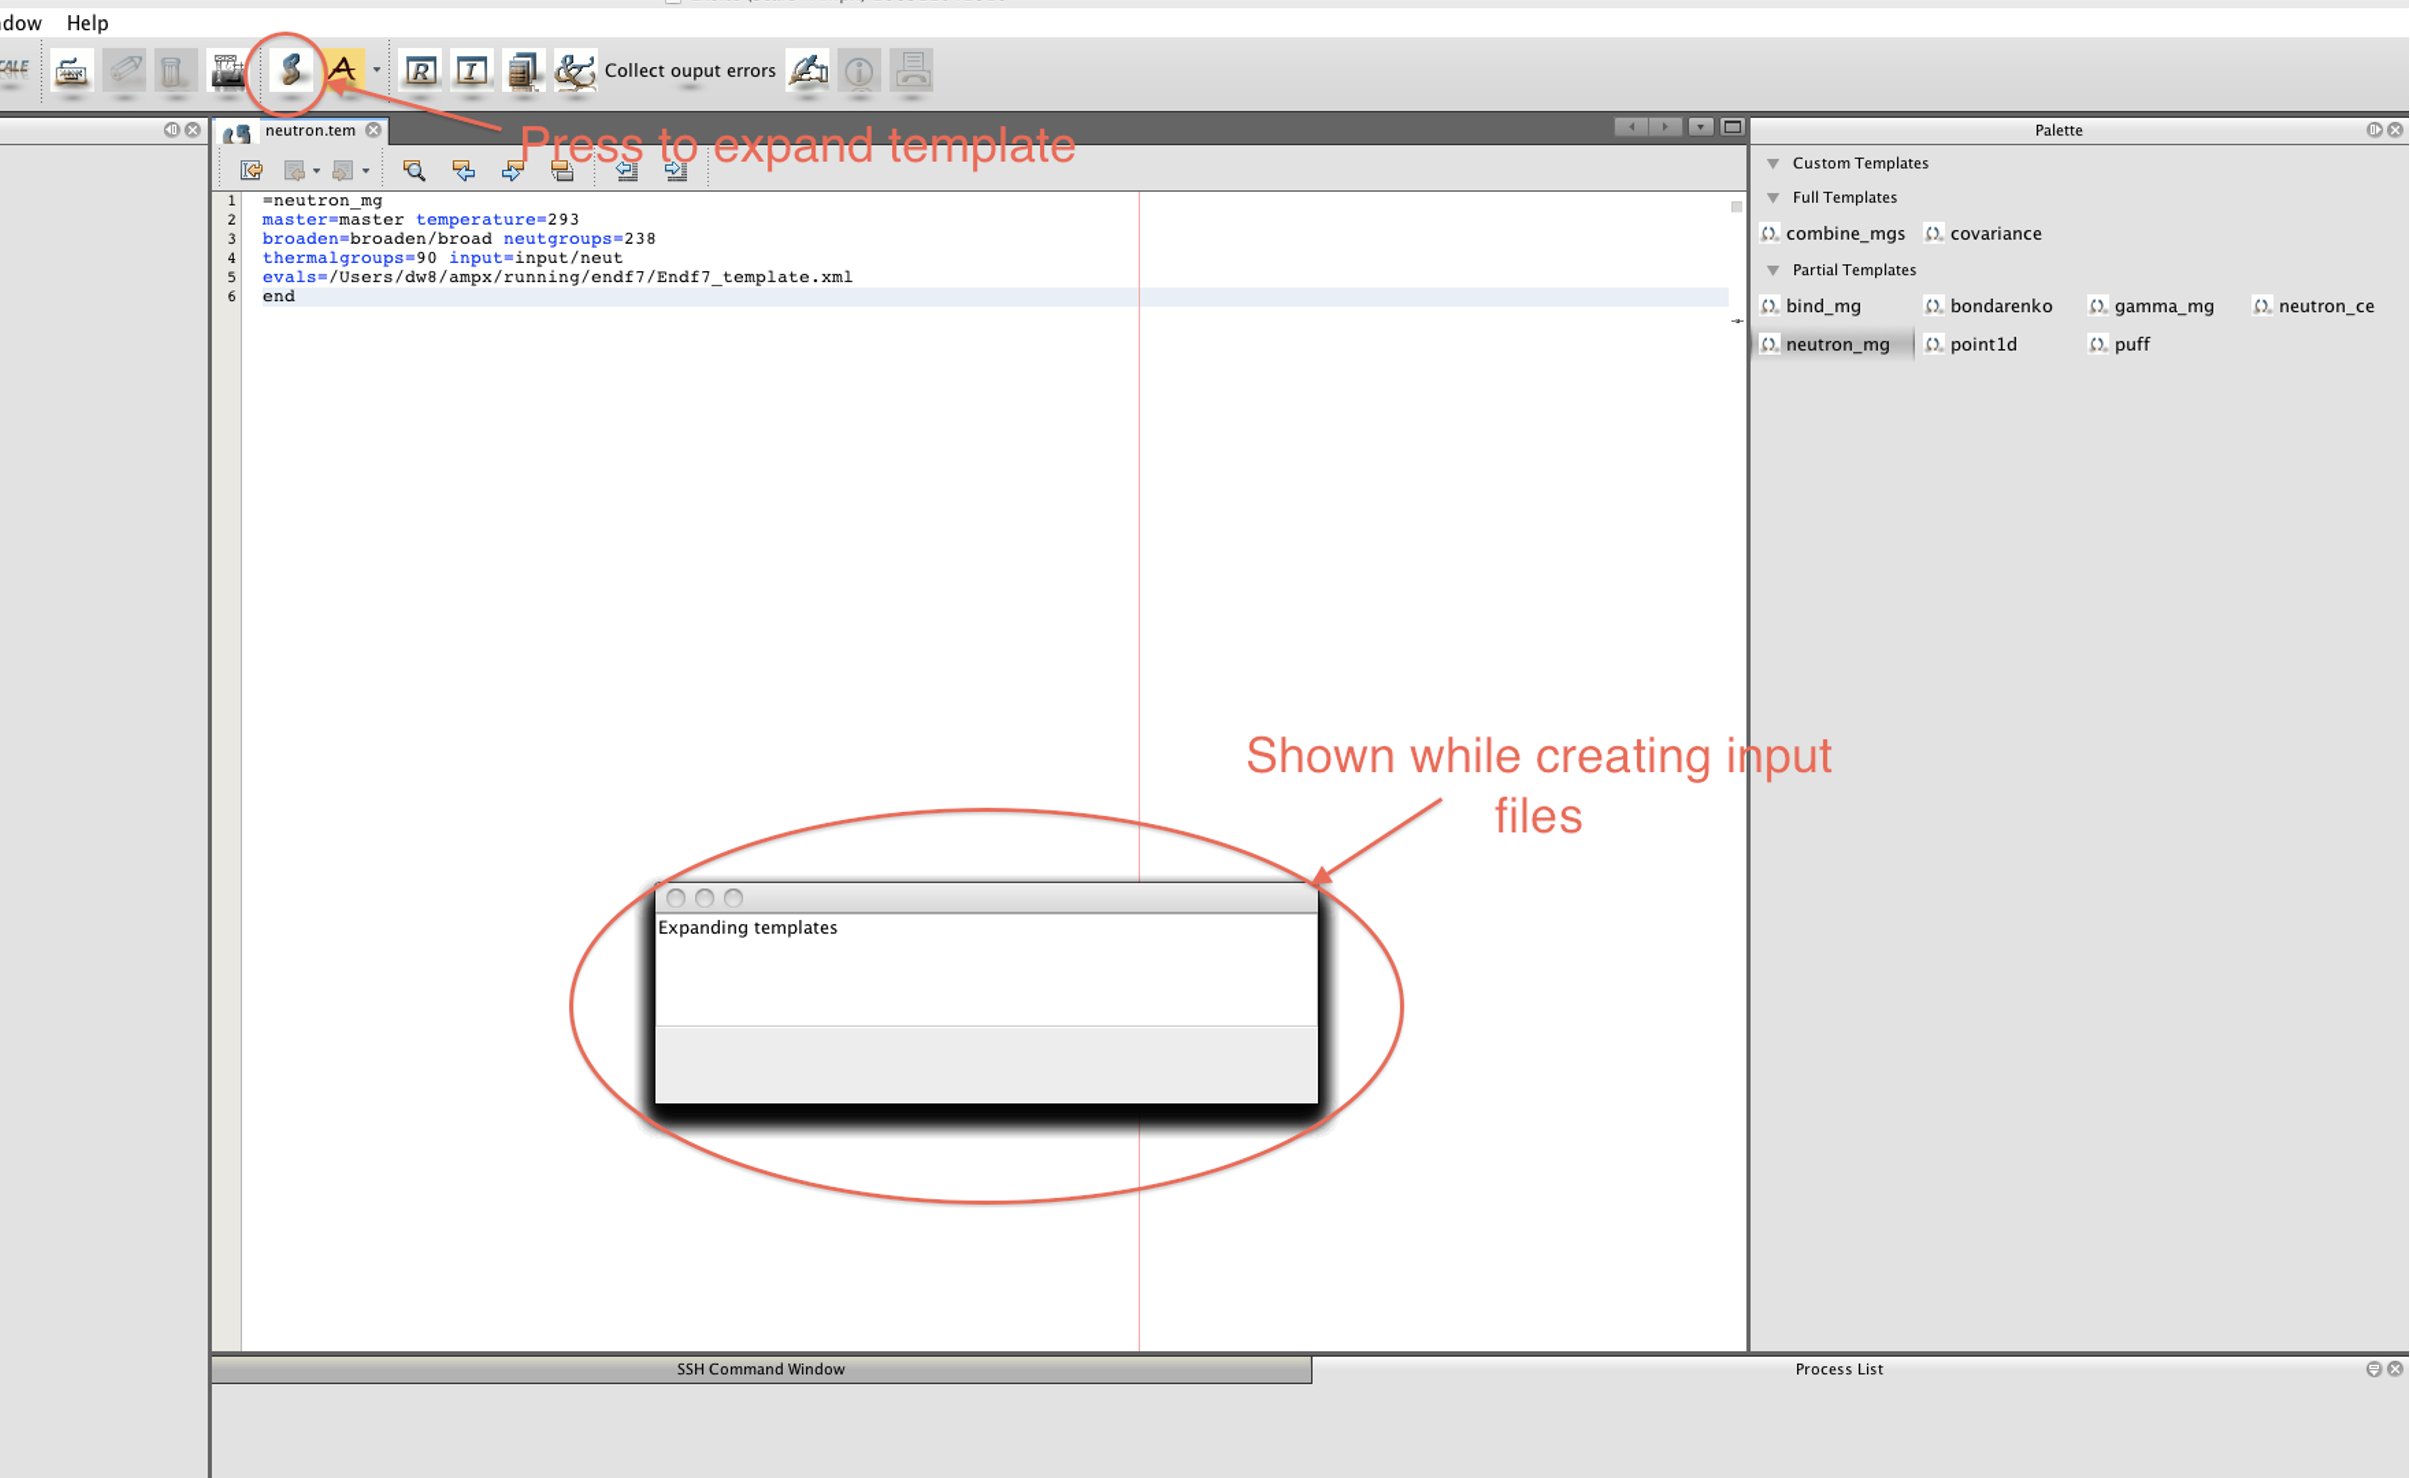
Fig. 11.4.7 Expand the templates into input files.
To generate an MG library, the input files generated from the templates listed below are run in the order specified:
point1d – generates point-wise cross section data. The cross section data are broadened to user-specified temperatures. All temperatures at which Bondarenko data are wanted must included.
neutron_mg – generates neutron MG data. This includes free gas data if desired, along with thermal data for thermal moderators if desired. In addition, gamma production data are generated if selected by the user.
gamma_mg – generates gamma MG data if a coupled library is desired. This template is used with the corresponding input files.
ptable – generates probability tables if Bondarenko factors from the probability table are desired.
bondarenko – generates full range Bondarenko factors. Alternately, bondarenko_prob is used to generate the Bondarenko factors using the probability method in the unresolved resonance range
bind_mg – combines the data generated in steps 1–5 into one library. This makes one MG library for each evaluation.
combine_mgs – combines the libraries for each evaluation created in step 5 into a final master library
If the user wants to create a master library file for a single evaluation, the template “master” can be used, which combines steps 1–6 except for thermal moderators. If the library is to contain thermal moderator data, then steps 1–6 must be followed.
To create a neutron CE library, the input files generated from the templates listed below must be run in the order specified:
point1d – generates point-wise cross section data. The cross section data are broadened to user-specified temperatures.
ptable – generates probability tables for evaluations that contain unresolved resonance data.
neutron_ce_partial – generates CE libraries.
The template neutron_ce combines steps 1–3 into one template.
To generate decay libraries, the inputs generated by the template listed below are run in the order specified:
origenlib – generates ORIGEN libraries (AMPX working libraries with special MT values encoding the level of the parent and child) for each desired evaluation.
combine_mgs – combines the libraries created in step 1 into one library.
To generate covariance libraries, the inputs generated by the following template are run:
master – creates a neutron master library.
point1d – creates point-wise data.
puff – creates the covariance matrices. The input file uses either the data generated in step 1 or step 2, depending on how the cross section data should be passed to module PUFF-IV.
combine_cov – combines the covariance matrices produced in step 3 into one library
If the user is producing covariance information for one evaluation, the template covariance, which combines steps 1–3 into one template, can also be used.
ExSite provides some templates to generate SCALE input files for infinite dilute test cases that provide a quick check for the generated libraries:
allnucinf – infinite homogenous medium case
allnuclat – a lattice case to test data in the thermal range
11.4.3. Edit Input Files
ExSite can be used to edit and create AMPX input files. To read an input file, the user opens a new input file or selects an existing input. Once the file is opened, a palette appears. The user drags one of the input modules to the input editor in the same the way the template input palette was used in Fig. 11.4.5. If an entry repeats, an additional dialog will often appear. An example is the input for POLIDENT. The initial dialog is shown in Fig. 11.4.8.
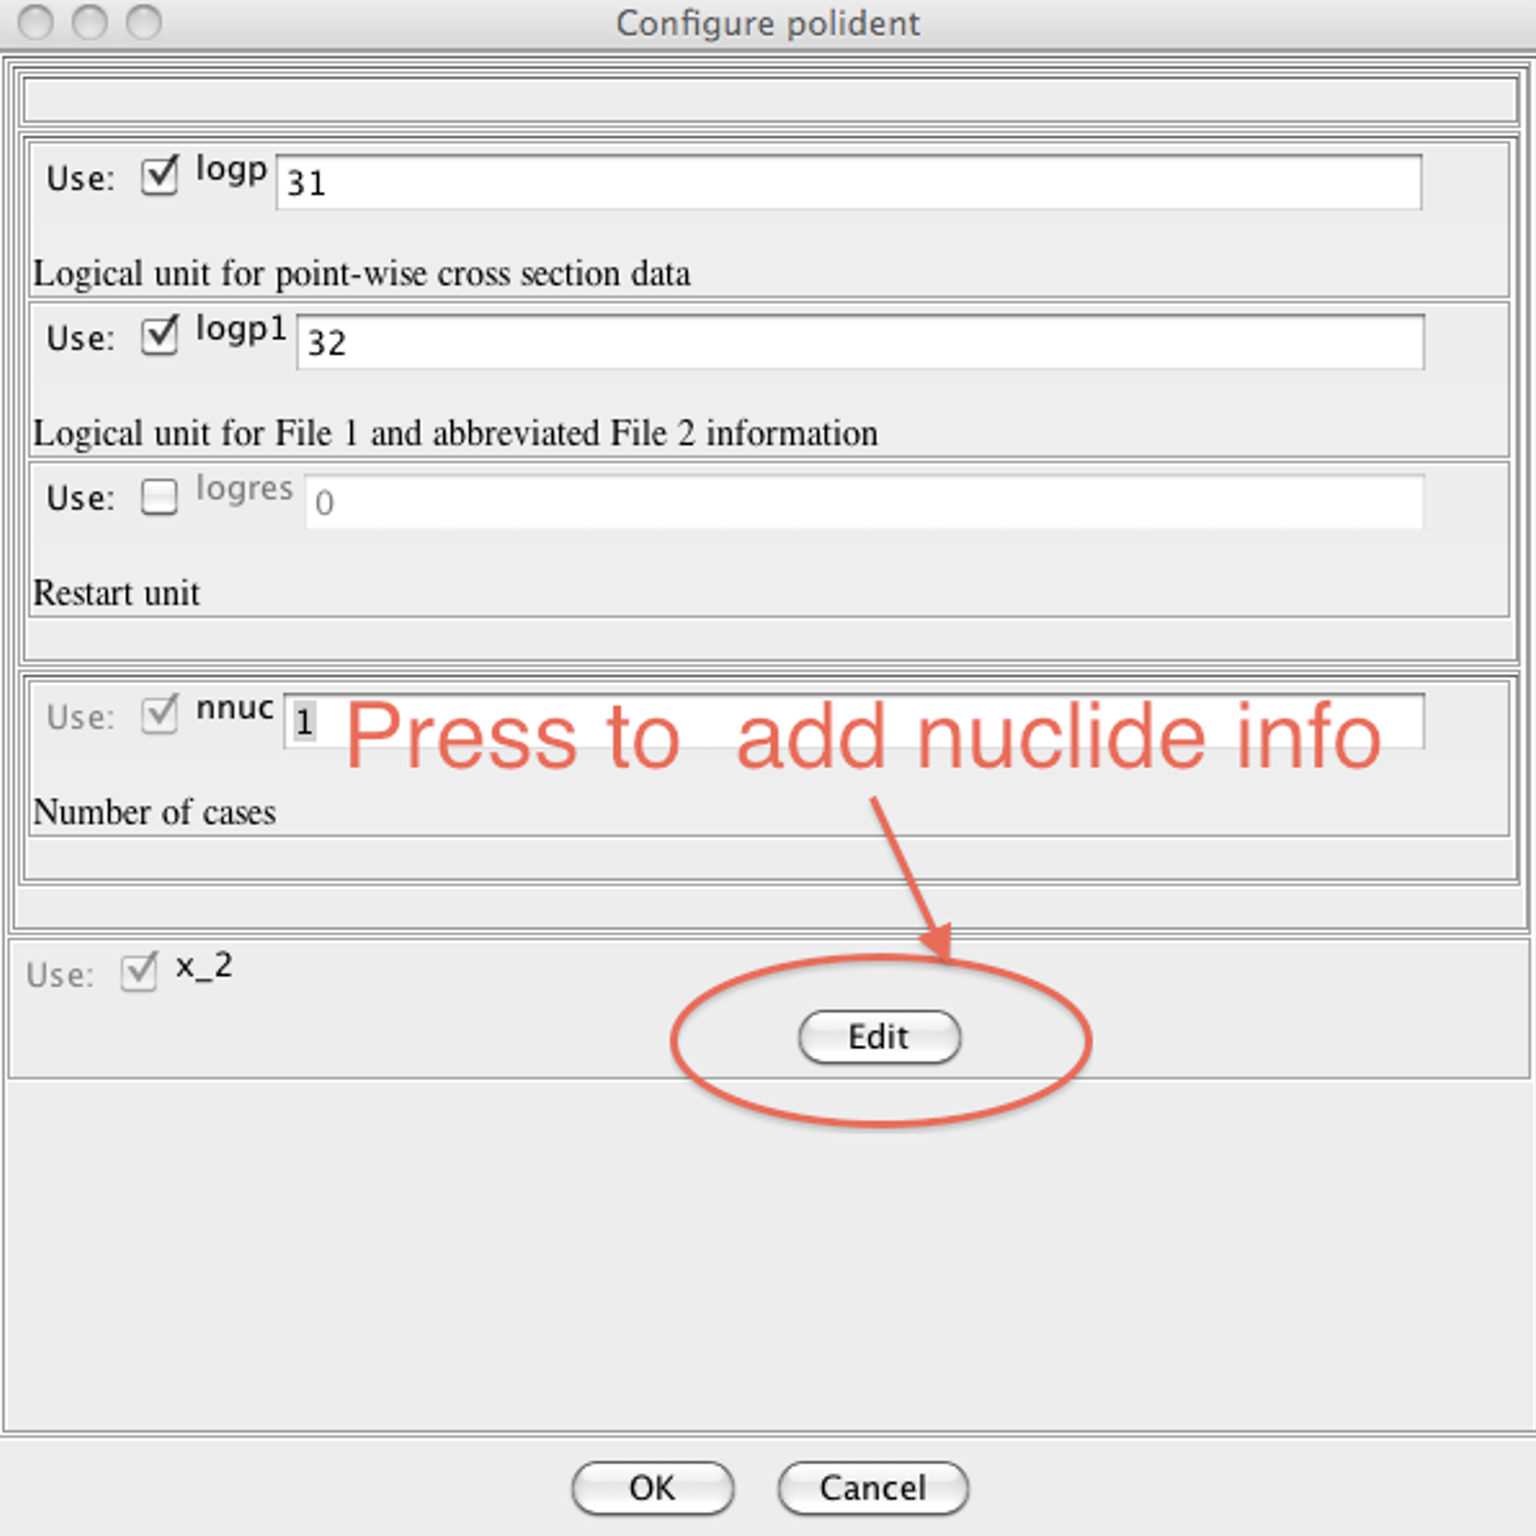
Fig. 11.4.8 Add nuclide info for POLIDENT.
Once the “Edit” button is pressed, an additional dialog appears. The dialog is shown in Fig. 11.4.9. The “Add” button adds a new entry. If there are already entries, selection of the desired entry will open it for editing. The “Remove” and “Activate” button will also become available, enabling the user to remove or reactivate an entry.
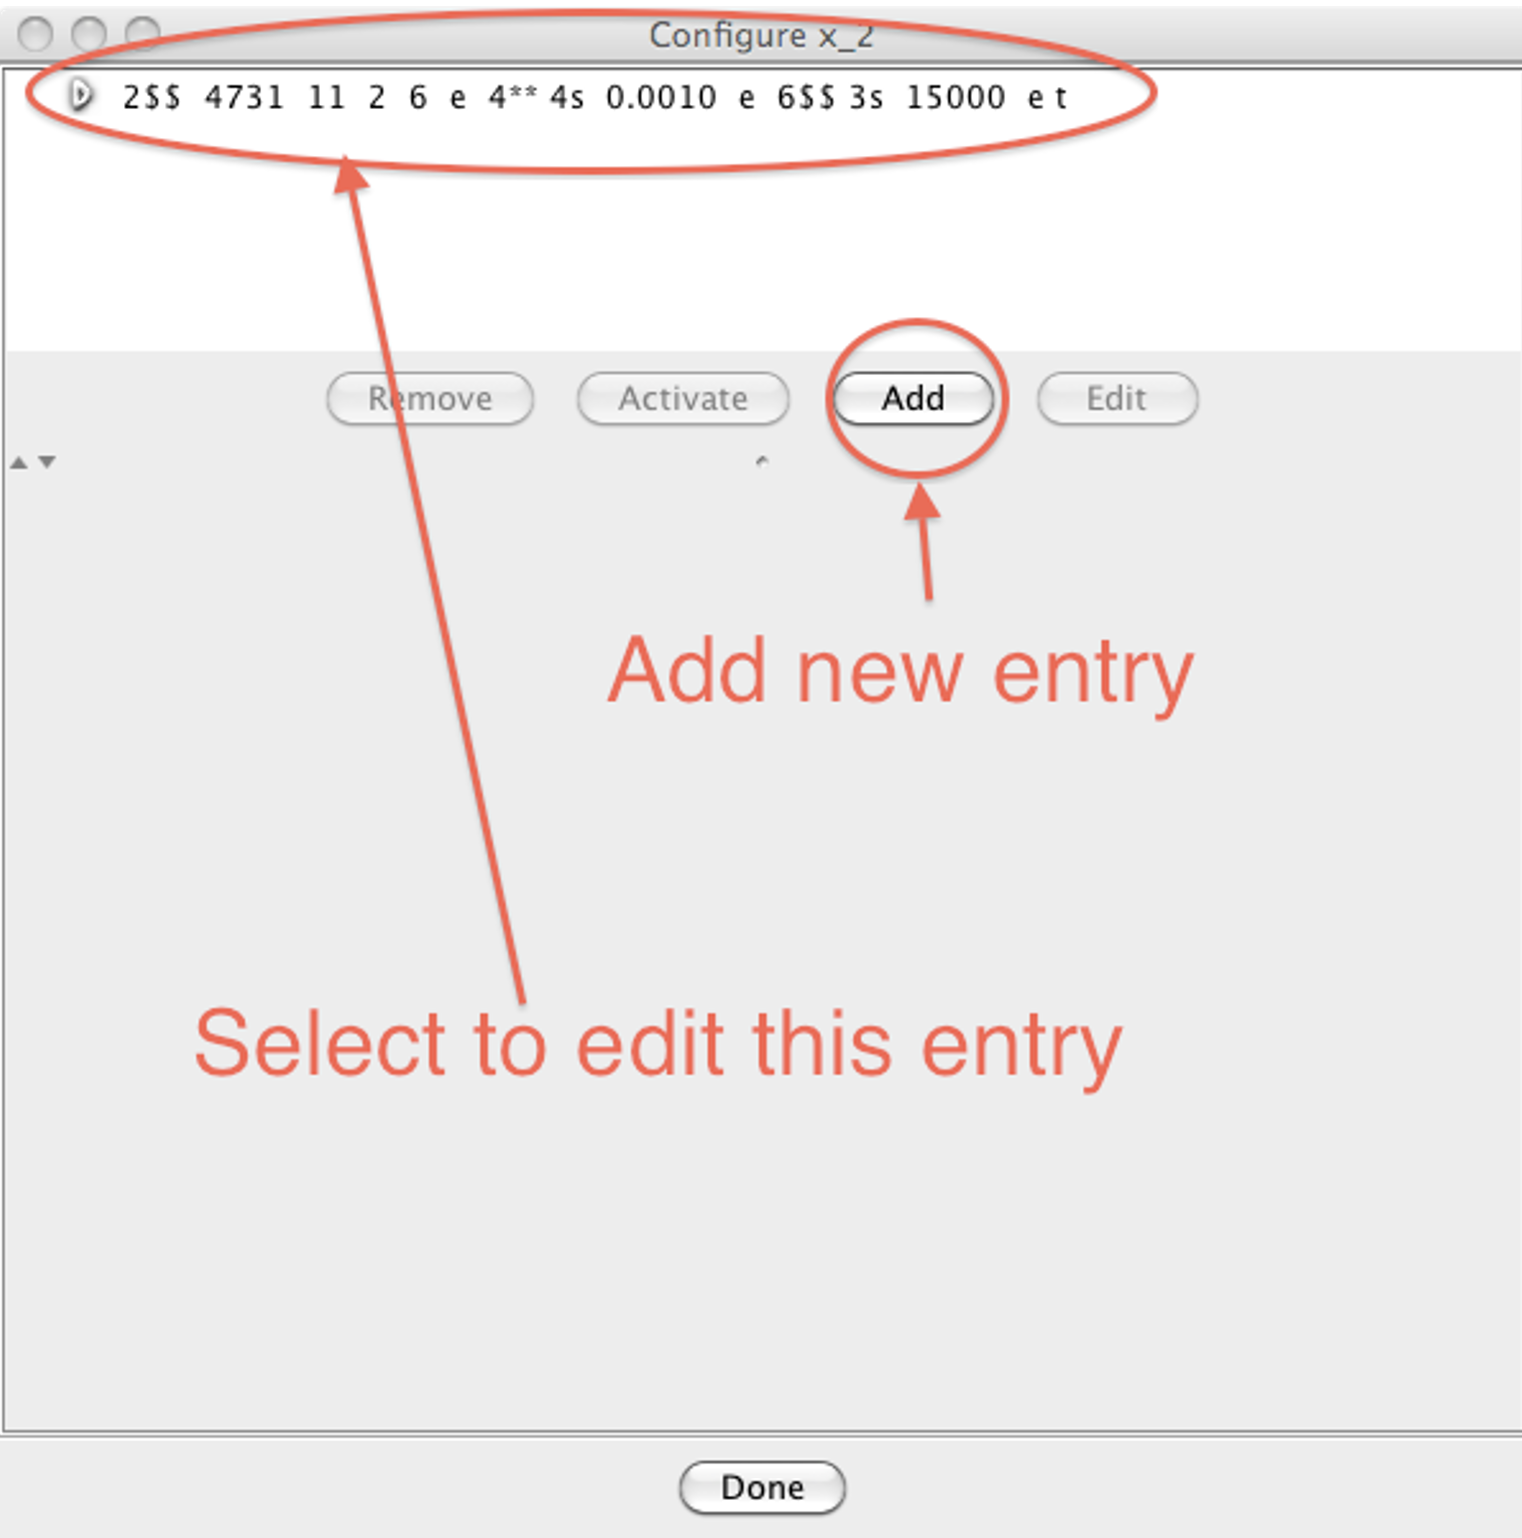
Fig. 11.4.9 Additional dialog for repeating entries.
Once the entry is open for editing, the user can edit the file, as shown in Fig. 11.4.10. Please note that the “Save” and “Cancel” buttons pertain to the current entry, and the “Done” button closes the secondary dialog.
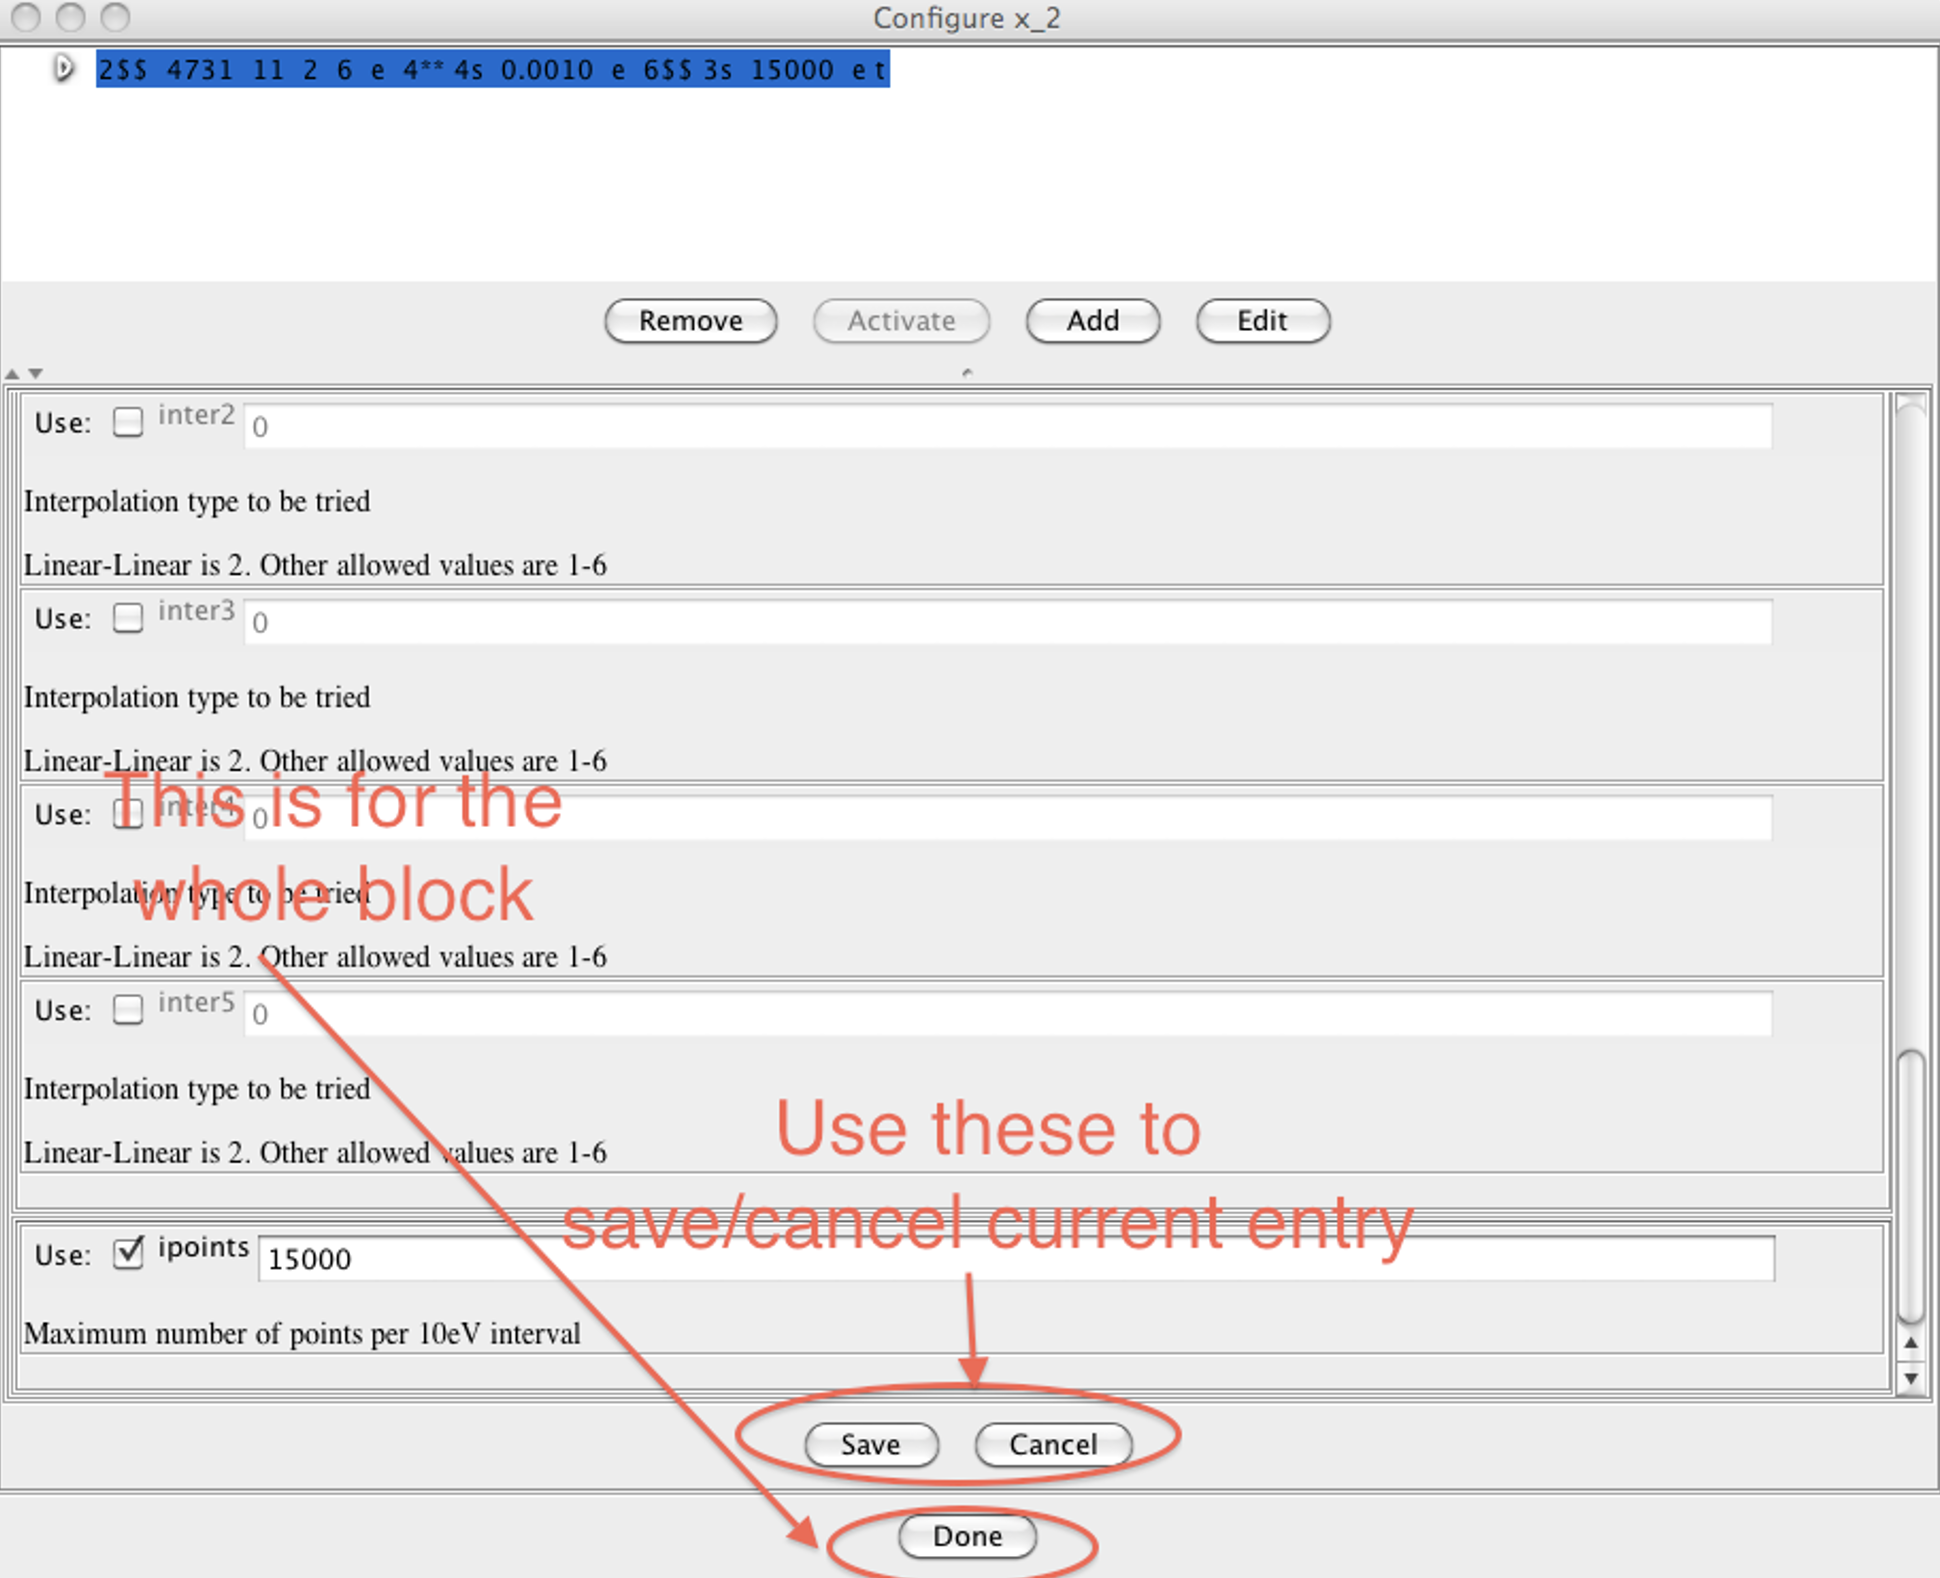
Fig. 11.4.10 Edit repeating entry.
The GUI allows the user to add new input instructions and to modify existing ones. To edit an existing entry, the user simply drags the desired input to the desired position, as shown in Fig. 11.4.11.
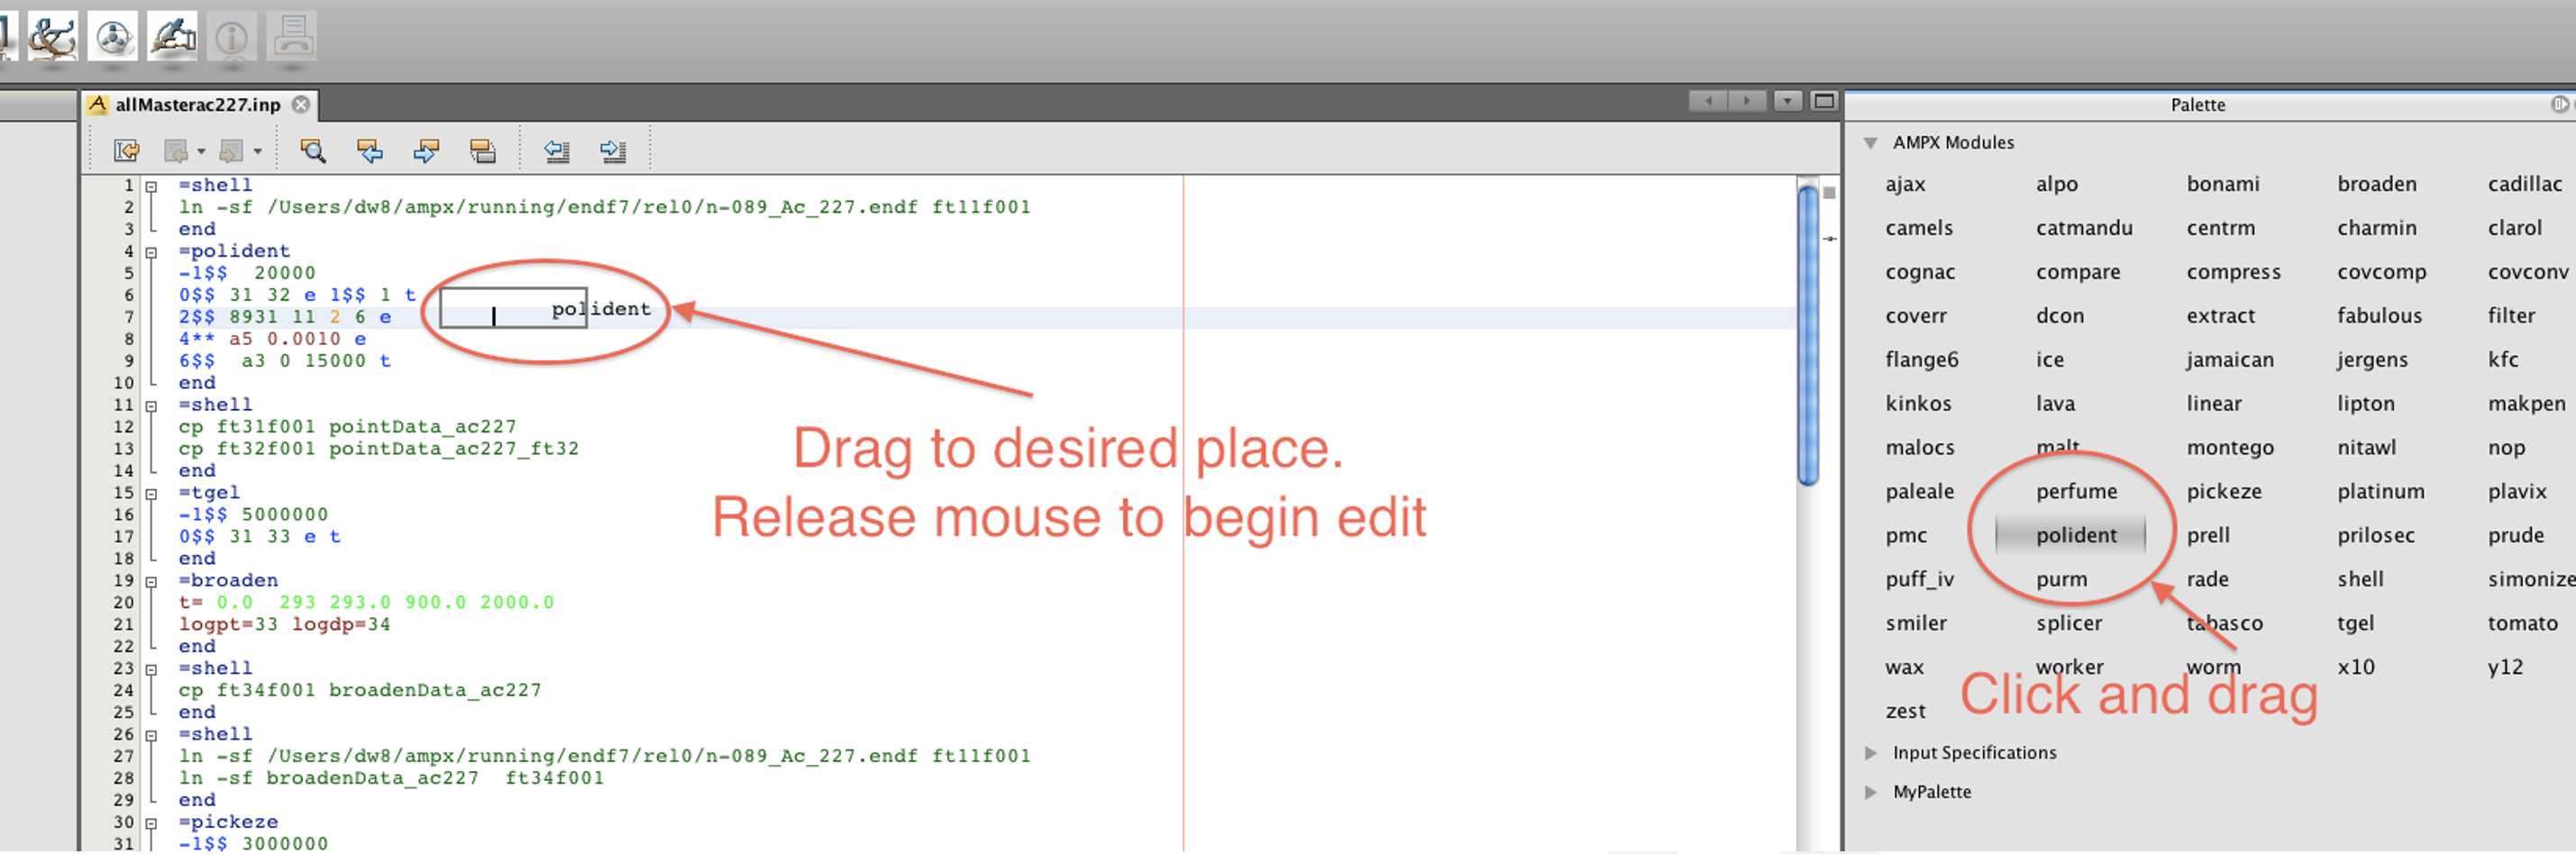
Fig. 11.4.11 Drag to edit input instructions.
To run an input file, the user presses the “A” button, as shown in Fig. 11.4.12. This will add the task into the “Process List” window. The status of the job will be updated automatically, or the user can press “Update Status” to immediately update. Once the job is finished, the user can right click on the job title and select to view the output or the message file. Input files can also be run directly from the command line using ampxrte.

Fig. 11.4.12 Run AMPX input file in ExSite.
Several tasks can be run in order. This is very helpful if processing all the input files for a library. To do so, select “Add Task List” from the “Scheduler” menu. As shown in Fig. 11.4.13, a new wizard appears that will guide the user through the process.
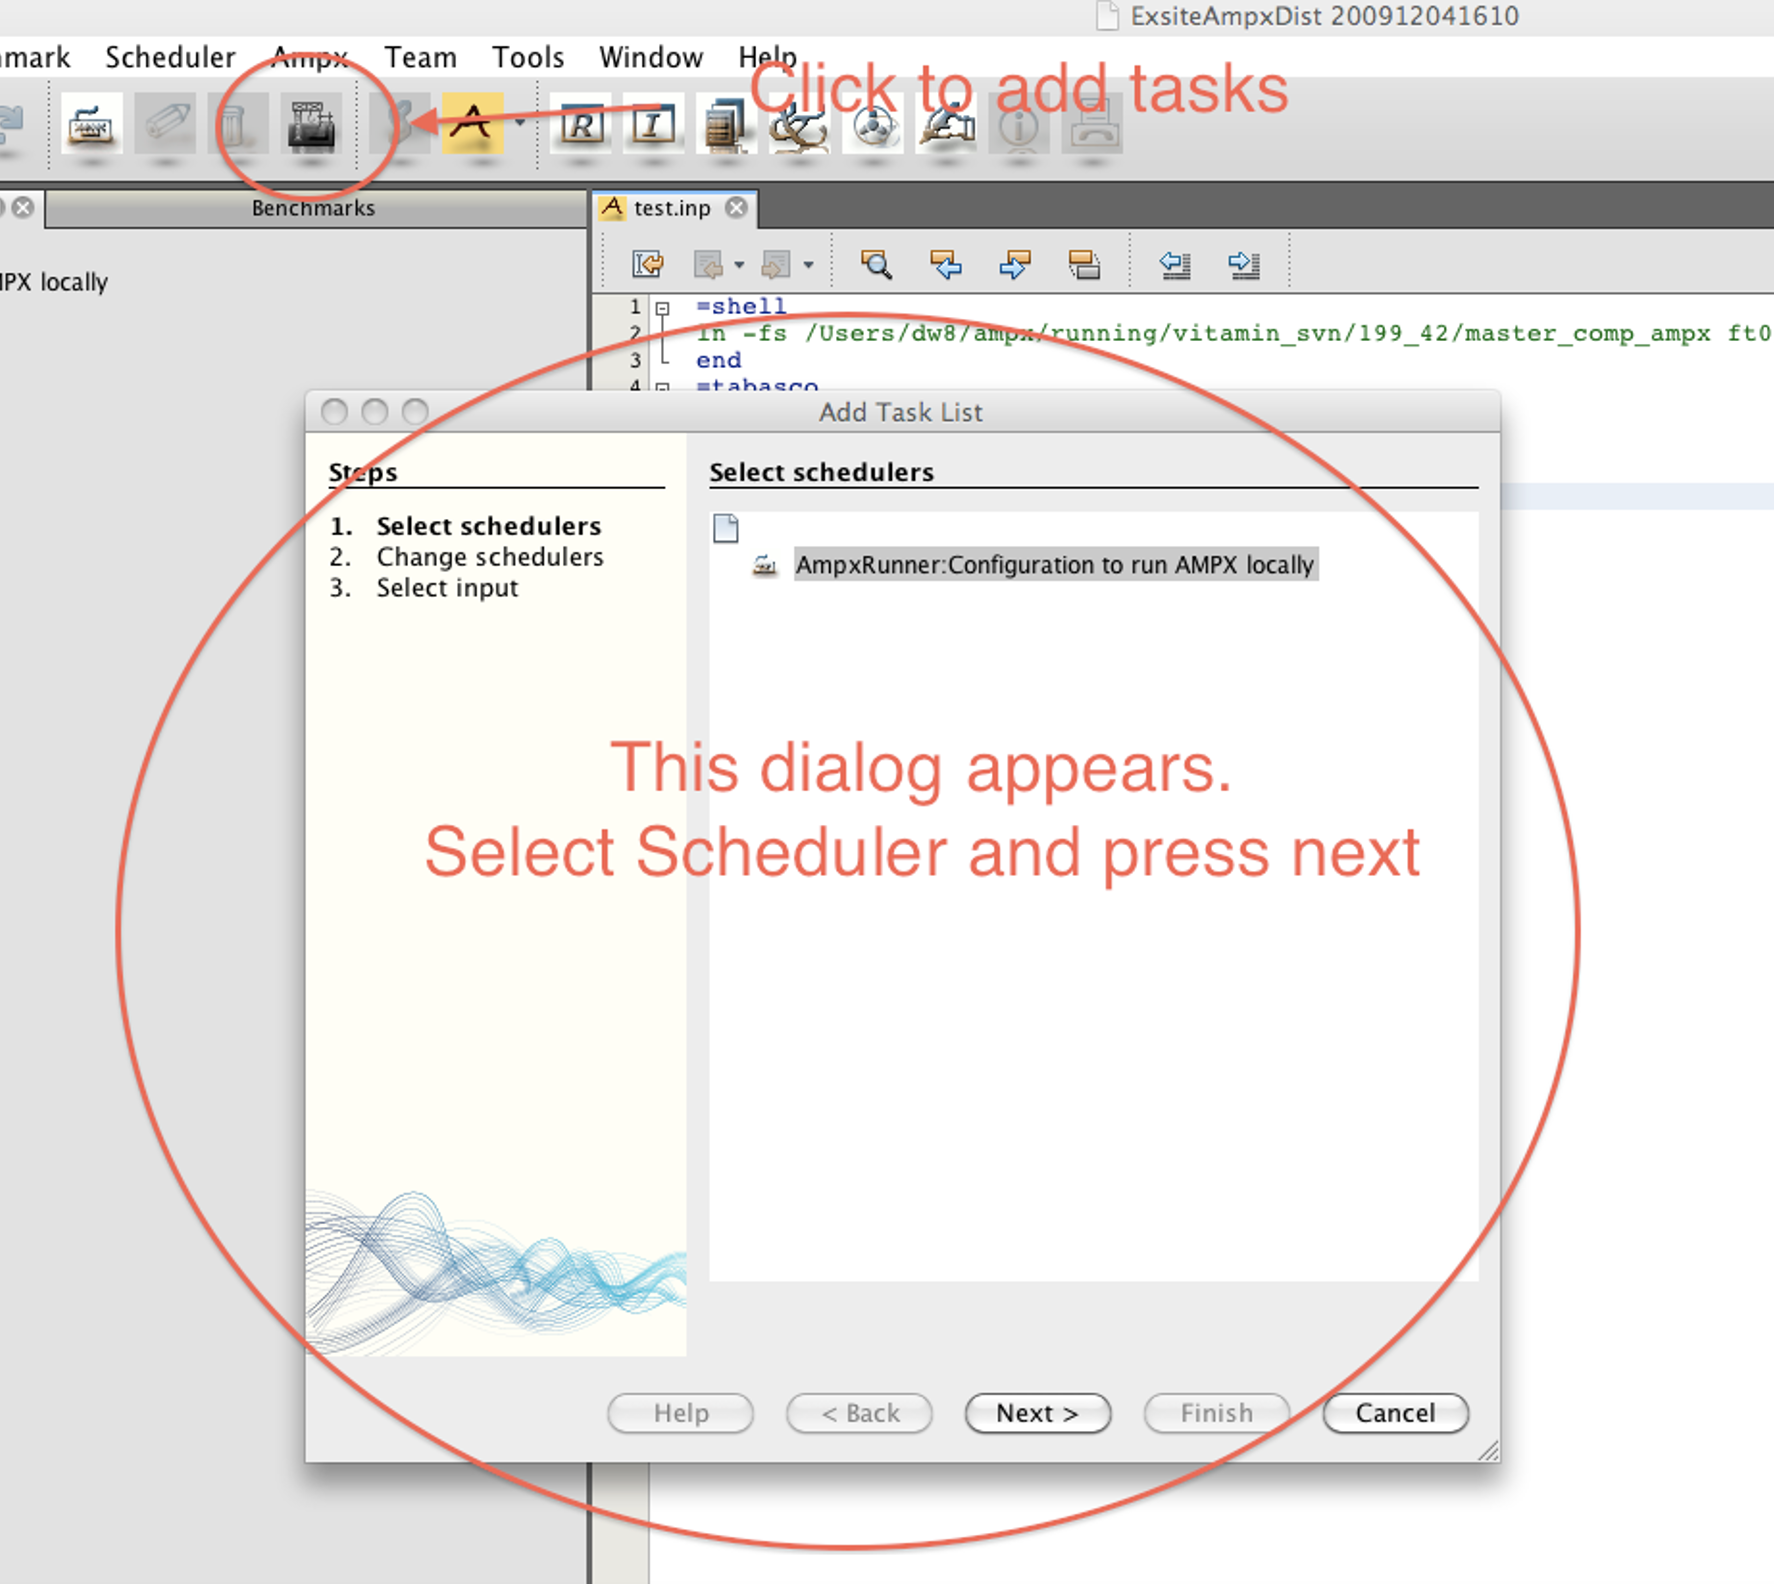
Fig. 11.4.13 Start wizard to add more than one task.
To start the wizard for adding more than one task, the user must select the directory in which the input files are to be run. This is not necessarily the directory in which the input files are located. If the input files are not in the same directory in which they will be run, they must be copied to that directory prior to starting AMPX. In a later step, the output and message file generated by AMPX will be returned to the original directory of the input file. As shown in Fig. 11.4.14, the user must press the “Change Scheduler” button before moving on to the next step.
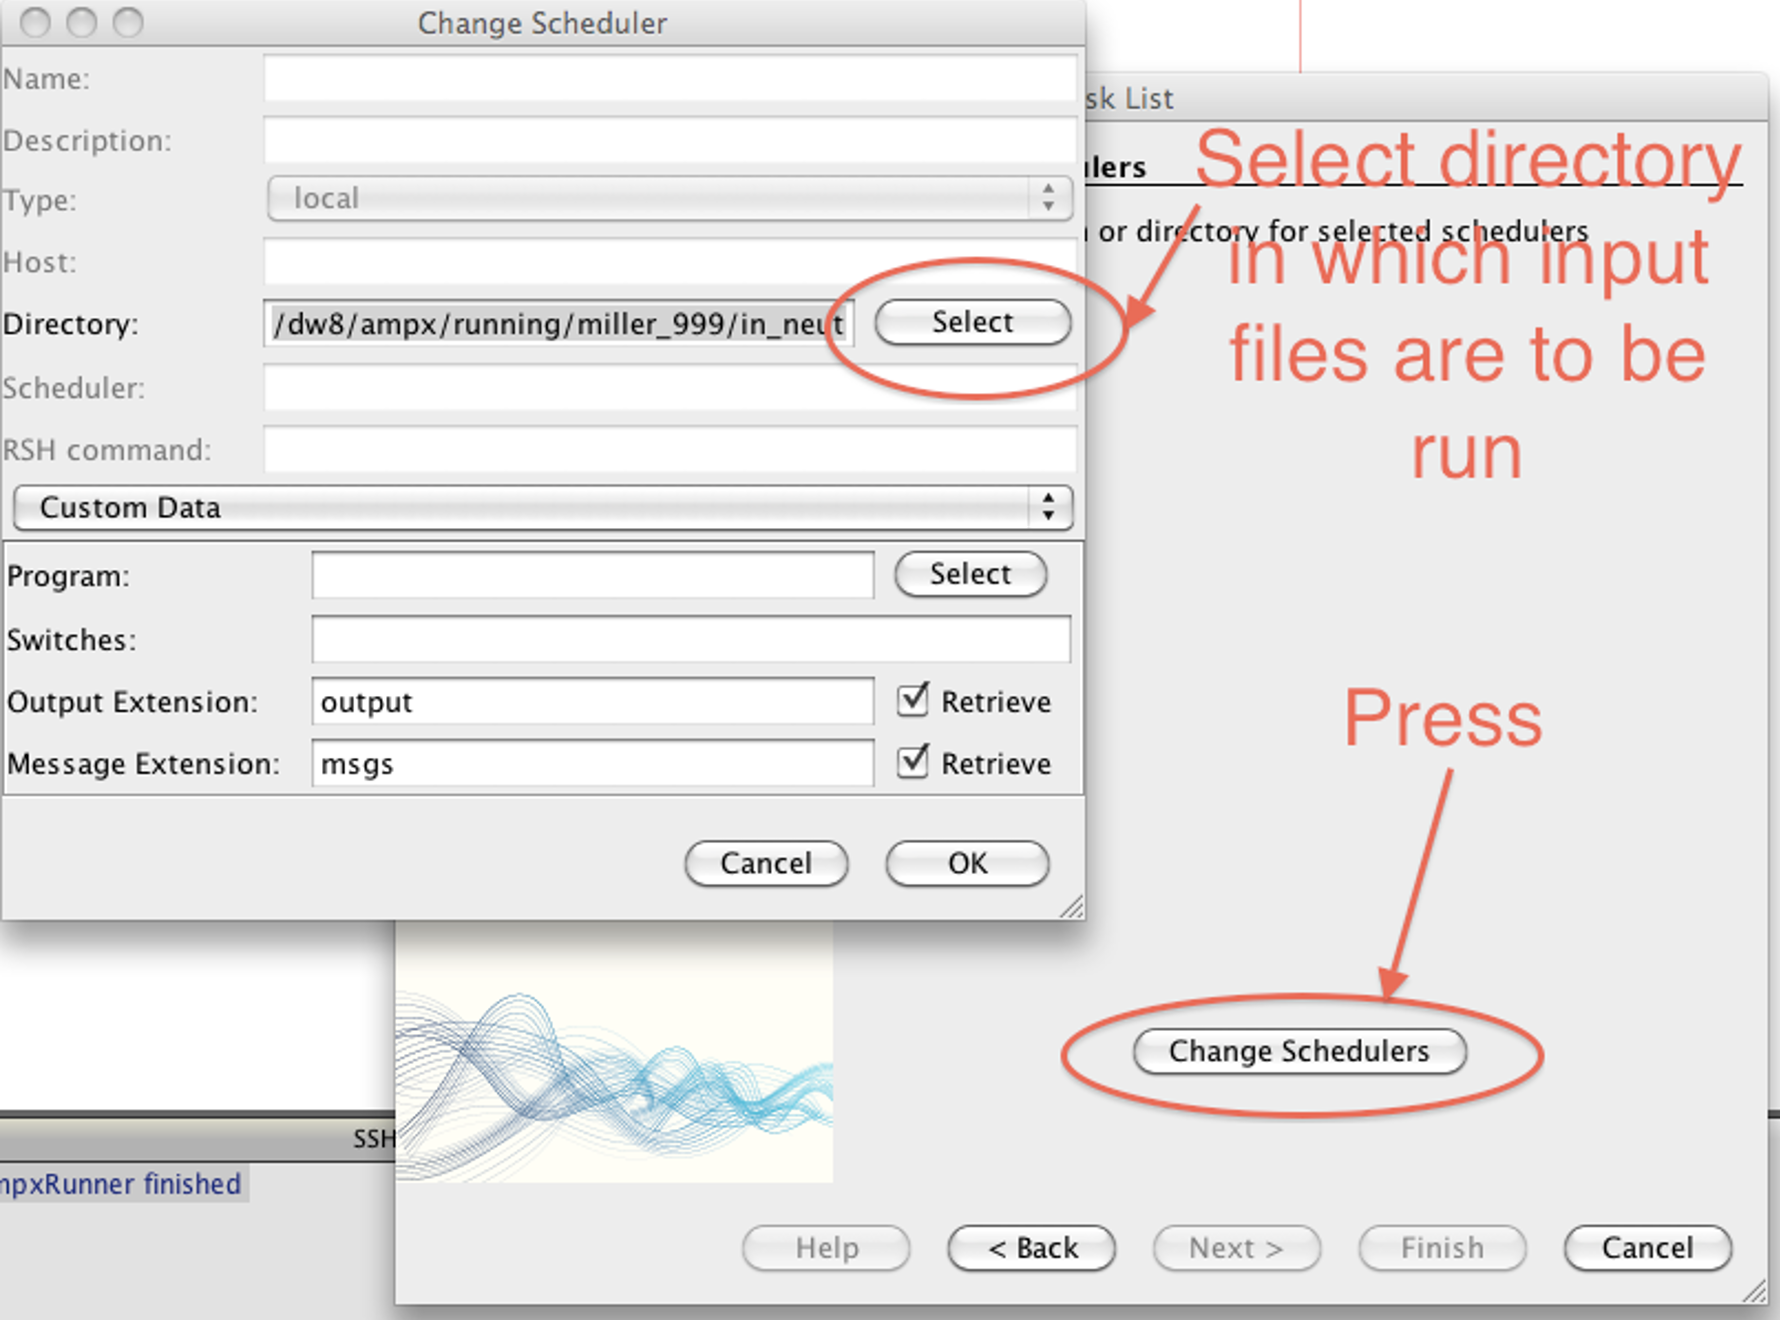
Fig. 11.4.14 Select the directory in which to run AMPX.
In the next step, the user selects the input files that should be run. After pressing the “Finish” button, the selected tasks are displayed in a new “Task List” bar, as shown in Fig. 11.4.15. At this point, the jobs have not yet been started. To start the jobs, press the “(Re)Schedule” button, which will submit the jobs into the queue. To check on the status of the jobs, press the “Update Status” button. On a Unix/Linux or Mac operating system, the program can now be terminated, and the jobs will continue to run in the background.
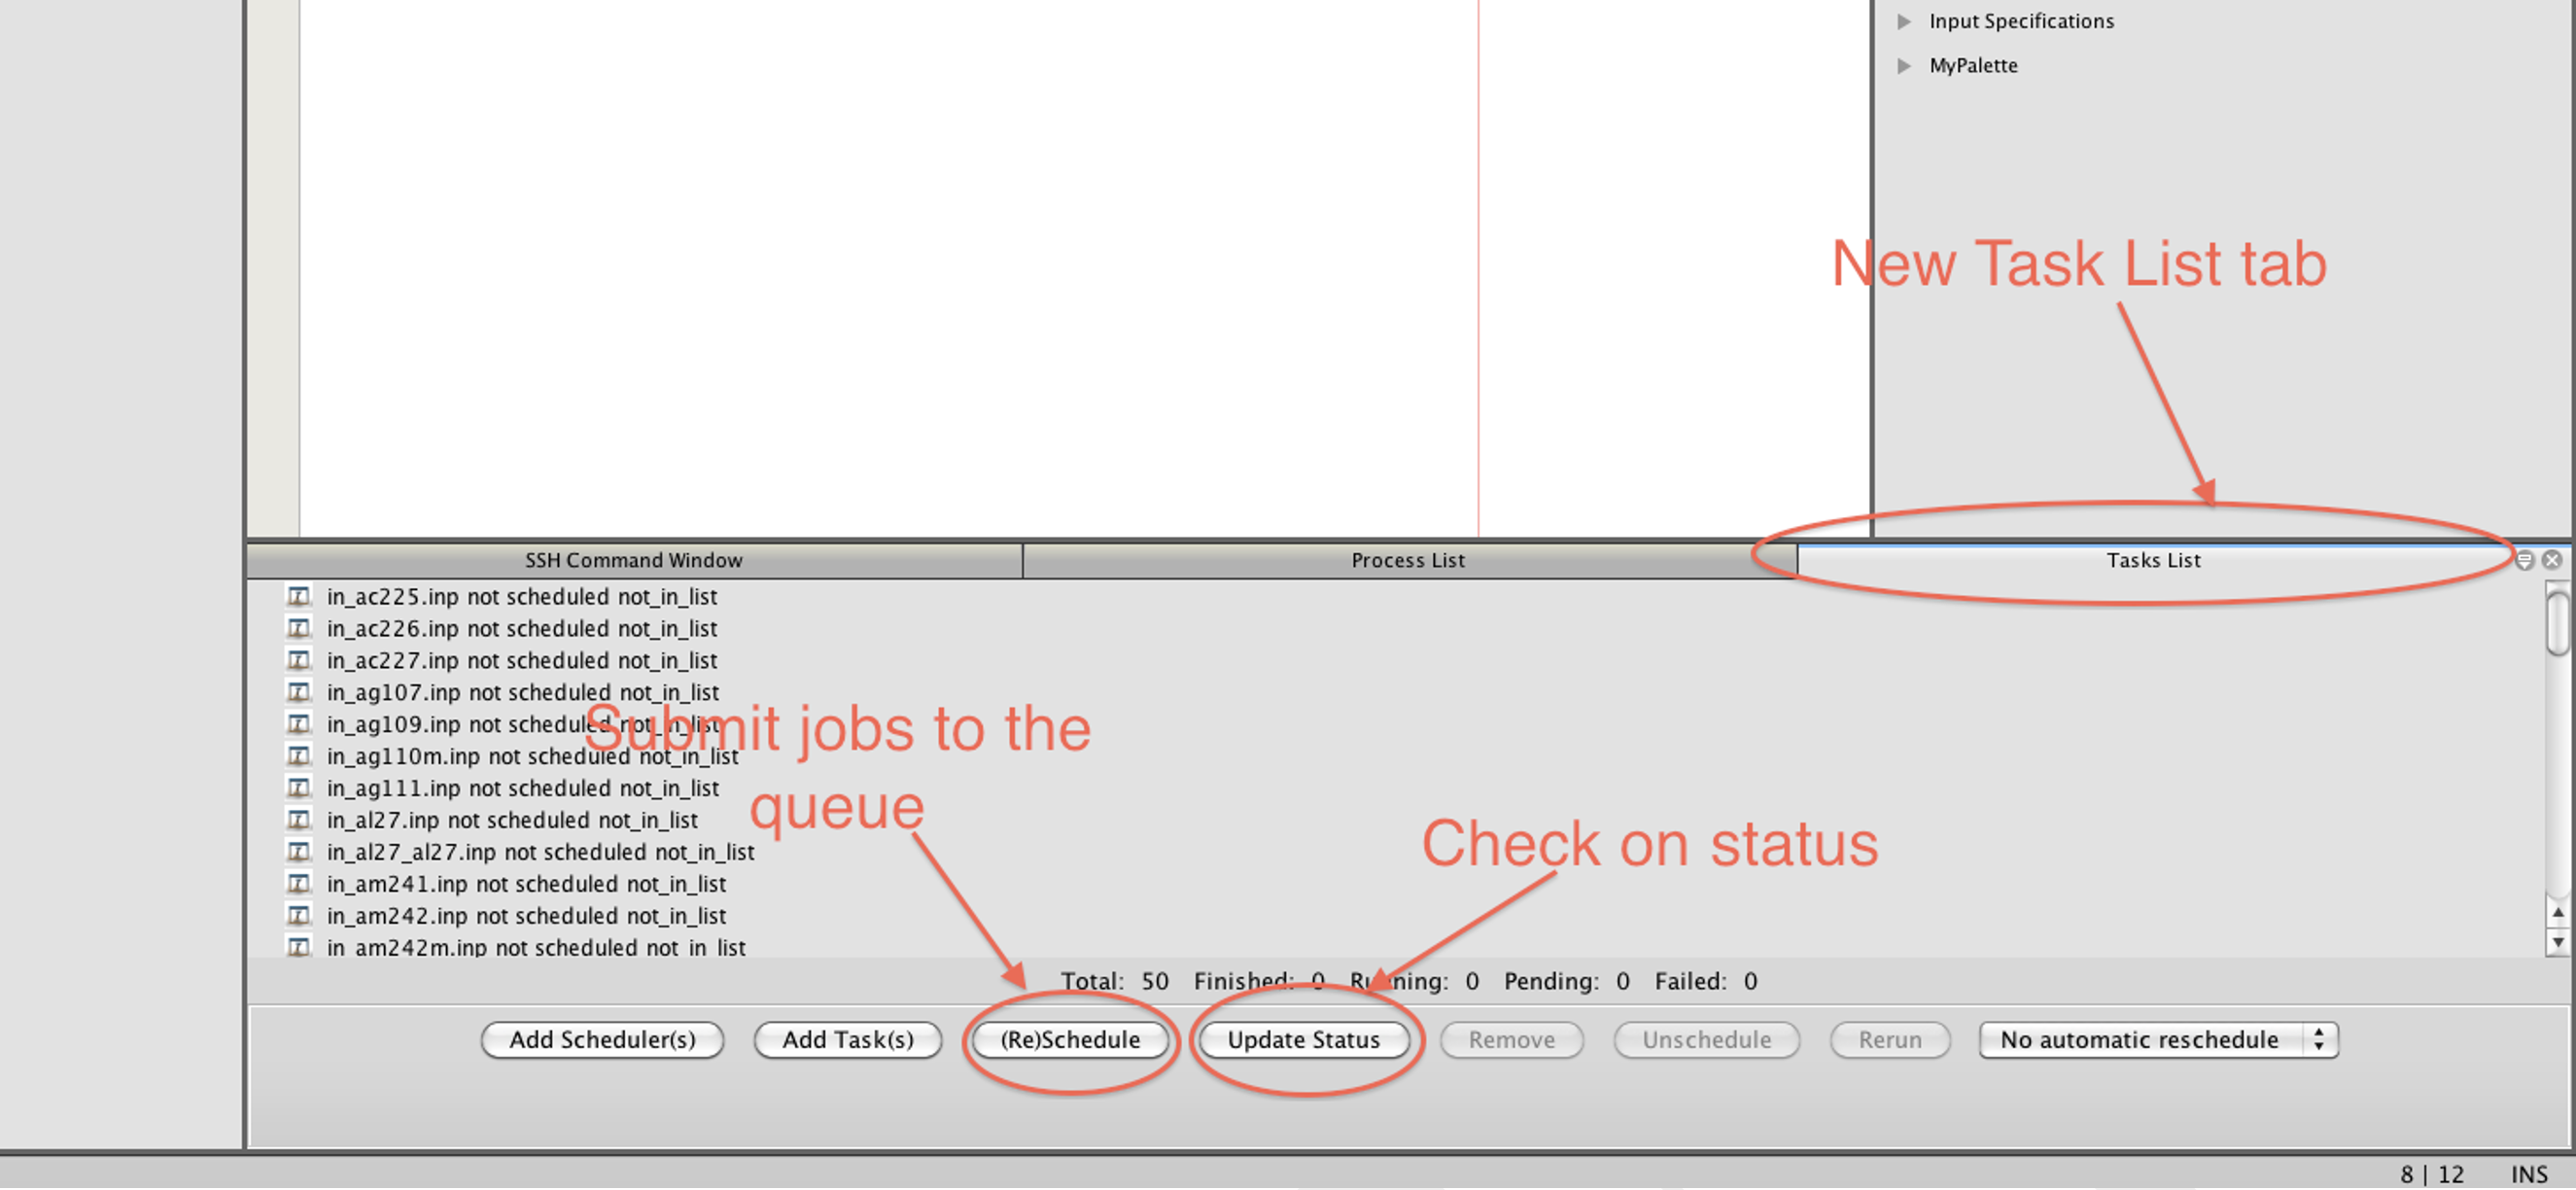
Fig. 11.4.15 Manage queue of submitted jobs.