12. Installing and Building SCALE
12.1. System Requirements
12.1.1. Supported Operating Systems
Linux 64-bit (RHEL 6 or newer)
macOS X (Darwin) 11.0 or newer
Windows 7, 64-bit or newer
12.1.2. Disk Space Requirements
You must have at least 180 GB free on your computer when you begin a SCALE 6.3 install! Once setup files are removed, the final disk usage for SCALE 6.3 will be ~110 GB.
You will need to download ~62 GB of data to begin the SCALE install:
SCALE data pak installer (61 GB)
SCALE code installer for your operating system (<1 GB)
Once these files are available locally on your machine, proceed with the installation instructions below.
Note
Once unpacked and installed, the SCALE data and code will be ~110 GB, which will increase the total disk space usage to ~171 GB. After verifying the install was successful, you may delete the data pak and code installers to free your disk of the ~62 GB in setup files, bringing the final install size to ~110GB.
12.1.3. Memory
Minimum: 8 GB (per CPU for parallel calculations).
Note
SCALE calculations vary widely with the amount of memory required. It is always possible to increase the complexity of a model and exceed the amount of memory available. Large TRITON-KENO 3D models can easily require 32 GB of memory.
12.1.4. Java requirements
Java 1.8 or newer.
12.2. Installation Instructions
The SCALE 6.3.0 installation has been divided into three components: 64-bit pre-compiled binaries, source code, and the data. The precompiled binaries are available in platform-familiar installers: NSIS on Windows, Drag-N-Drop bundle on Mac, and Tar GZip on Linux. For deployments that include source code, it is available as a zip file, and the data are available as a self-extracting IzPack installer. Other systems may require a custom build of SCALE from source code using the build instructions provided below.
Pre-Compiled Binaries
Note
After the Binaries are installed, the nuclear data still must be installed. After completing the binary installation according to the instructions in this section, please follow the instructions for SCALE 6.3 Data.
Windows
Double-click the Windows installation file “SCALE-6.3.0-setup.exe”, agree to the terms, and the following “Welcome” dialog will be shown.
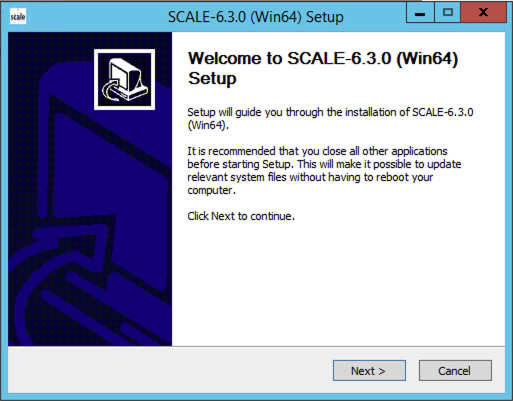
Fig. 12.2.1 Example Windows installation start screen.
Follow the prompts through the install. There are two user decisions. The first is regarding the install location, as shown below. Generally, the “C:SCALE-6.3.0” is sufficient. (Do not install SCALE to the “Program Files” directory, as it has insufficient default privileges.)
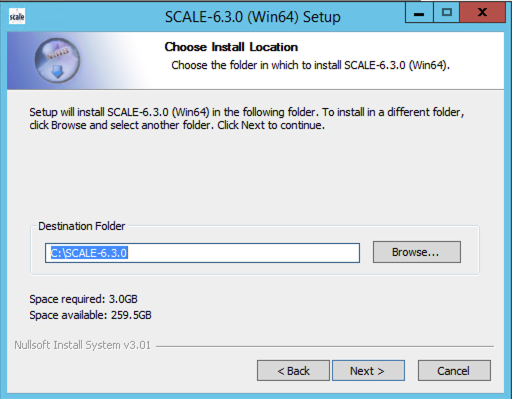
Fig. 12.2.2 Example Windows install location.
The next user decision is to designate the name of the SCALE 6.3.0 application folder within the Windows start menu. The default is “SCALE 6.3.0 (Win64)”; however, changing this name will not affect the installation in any way.
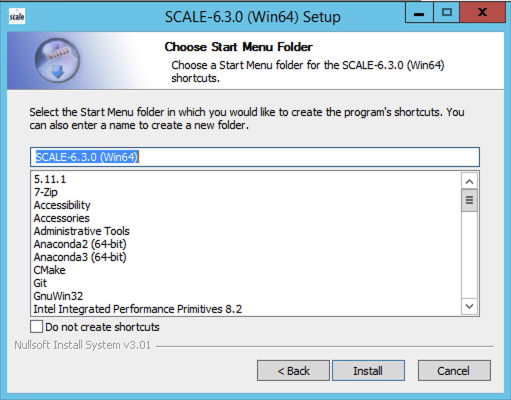
Fig. 12.2.3 Example Windows start menu folder selection.
The installation can take several minutes. Note that Norton Antivirus on Windows requires an exception for the SCALE Runtime Environment program, scalerte.exe. If using Norton Antivirus, please establish this exception prior to testing; otherwise, SCALE 6.3.0 will not be able to execute. Once installation is complete, follow the instructions given below to install SCALE 6.3 Data.
Mac OSX
Double click the Mac OSX installation file “SCALE-6.3.0-setup.dmg”; after a few moments, the following screen will open.
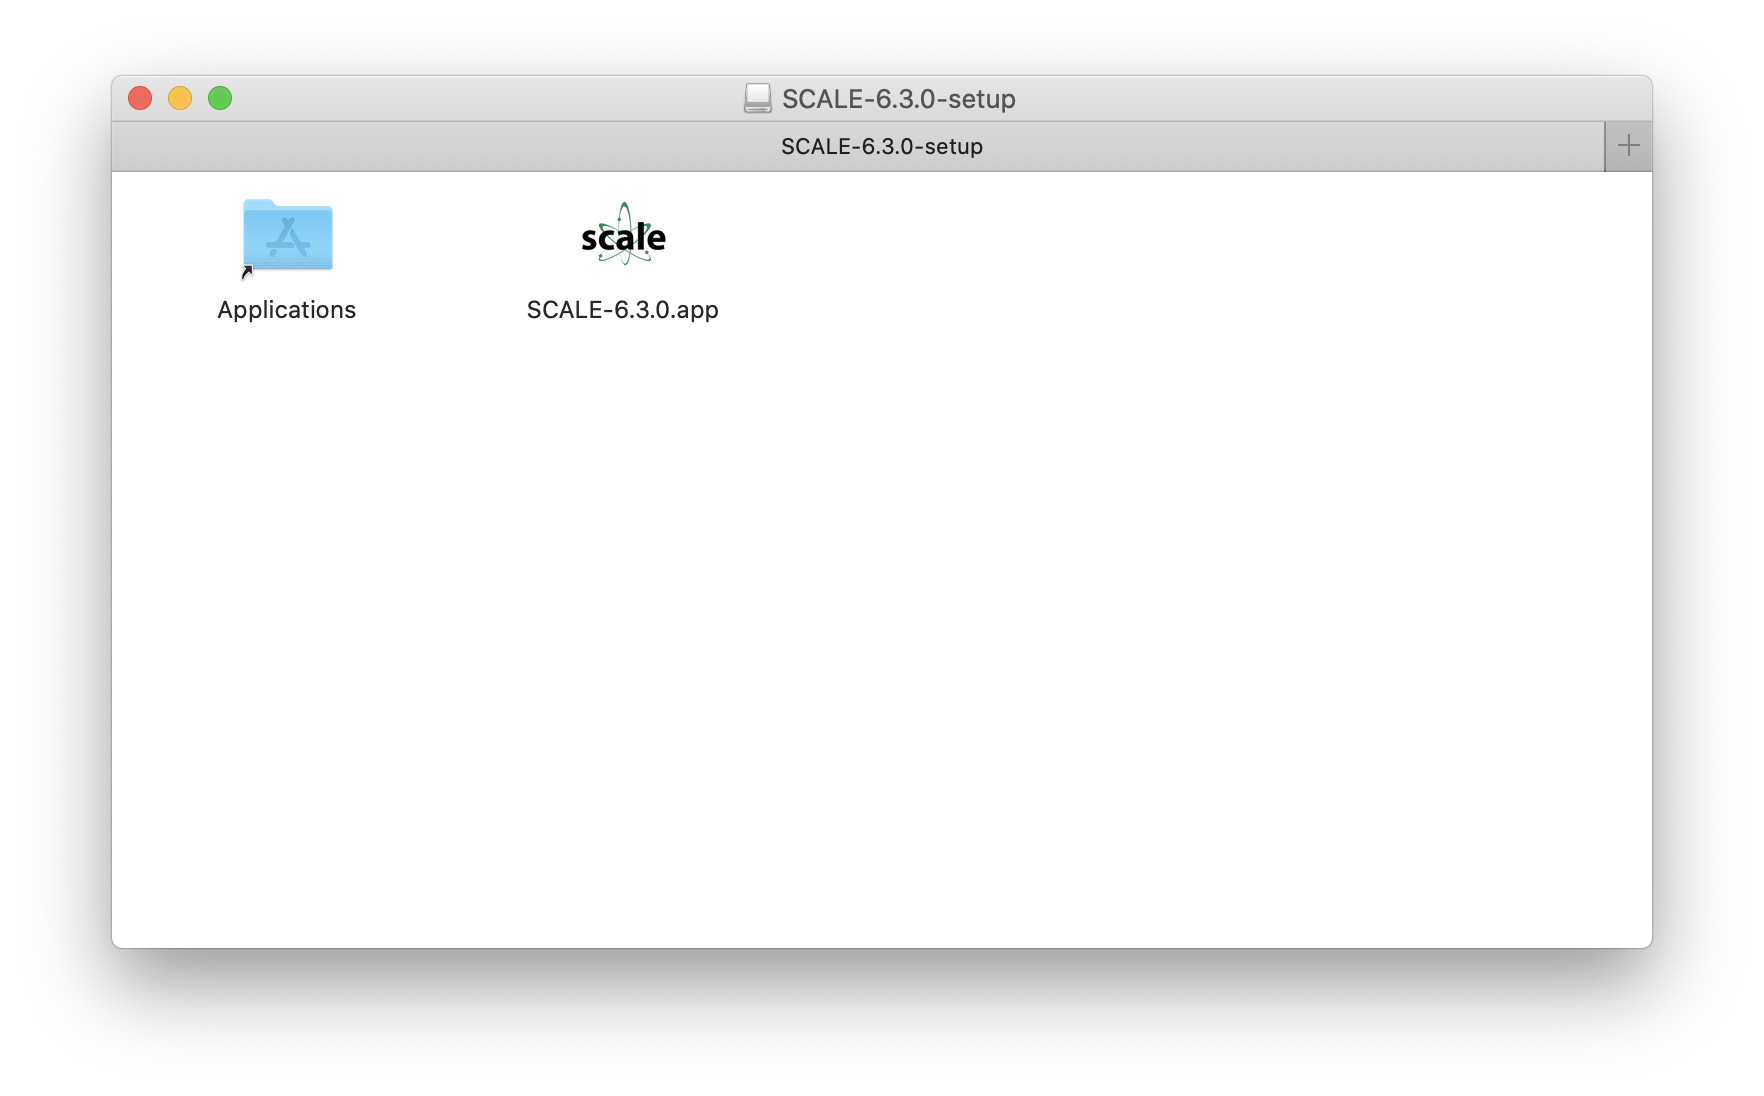
Fig. 12.2.4 Example Mac OS X bundle contents.
Drag the “SCALE-6.3.0.app” icon onto “Applications” to install SCALE-6.3.0. Once installation is complete, follow the instructions given below to install SCALE 6.3 Data.
Linux
Copy the SCALE-6.3.0.tar.gz to the installation directory. Invoke ‘tar -xzf SCALE-6.3.0.tar.gz’ to create the SCALE-6.3.0 directory.

Fig. 12.2.5 Example Linux Tar GZip.
Once installation is complete, follow the instructions given below to install SCALE 6.3 Data.
Source Code
If you received the source code version, you can unzip SCALE-6.3.0-Source.zip file to any location on your computer.
For example, on a Windows platform, double click the SCALE-6.3.0-Source.zip file. This will extract the files into the “SCALE-6.3.4-Source” directory.
On Linux and Mac OS X, create a destination directory for the source and copy the SCALE-6.3.0-Source.zip into that directory.
Change to the directory and invoke unzip SCALE-6.3.0-Source.zip to
deploy the source code.
12.2.1. SCALE 6.3 Data
Note that if you have SCALE 6.3 data installed from a prior SCALE 6.3 installation, you can copy or link the data into the SCALE 6.3.0 directory. To link preinstalled SCALE 6.3 data, open a command prompt and change the directory to the SCALE 6.3.0 installation directory:
(C:\SCALE-6.3.0, /Applications/SCALE-6.3.0/Contents/Resources, etc.).
On Windows, the following will link the SCALE 6.3 data into the SCALE 6.3.0 installation. (This may require administrative privileges.)
mklink /D data C:\SCALE-6.3\data
On OS X, the following will link the SCALE 6.3 data into the SCALE 6.3.0 installation:
ln -s /Applications/SCALE-6.3.app/Contents/Resources/data data
On Linux, the following will link the SCALE 6.3 data into the SCALE 6.3.0 installation:
ln -s /scale/scale6.3/data data
To begin installation of SCALE 6.3 data, copy the
scale-6.3-data-setup.jar to your local disk. Double-click this jar
file. If the installer does not start, then bring up a command prompt
or terminal window and issue the following command: java -jar
scale-6.3-data-setup.jar in the location where the installer jar file
was copied.
After launching the installer, a dialog should appear as shown below.
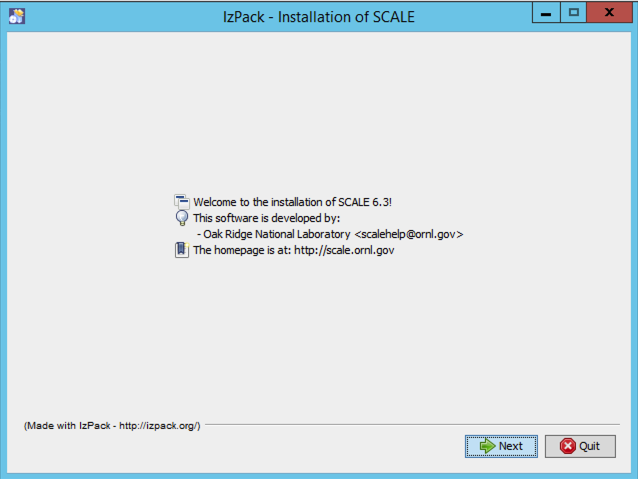
Fig. 12.2.6 SCALE 6.3 data installer welcome dialog.
Continue by pressing Next.
You will be prompted to review and accept the terms of the license agreement.
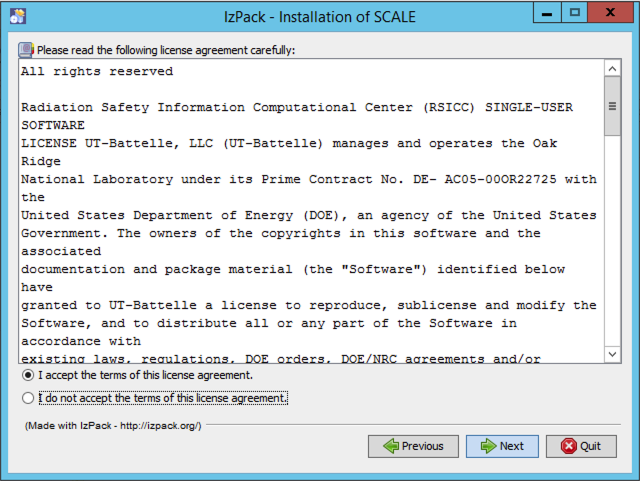
Fig. 12.2.7 SCALE license agreement.
To proceed, check to indicate your acceptance of the terms, and press next. You will be prompted to choose the destination of your installation.
For Windows users, the recommended installation path is inside your SCALE-6.3.0 directory:
c:\SCALE-6.3.0
For Linux, a typical location is:
/scale/scale6.3.0
For Mac, a typical location is:
/Applications/SCALE-6.3.0.app/Contents/Resources

Fig. 12.2.8 Example setting typical data installation path on Windows.
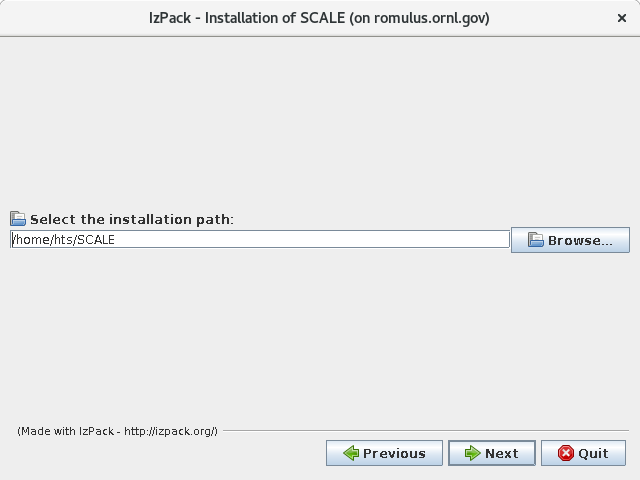
Fig. 12.2.9 Example setting a typical data installation path on Linux.
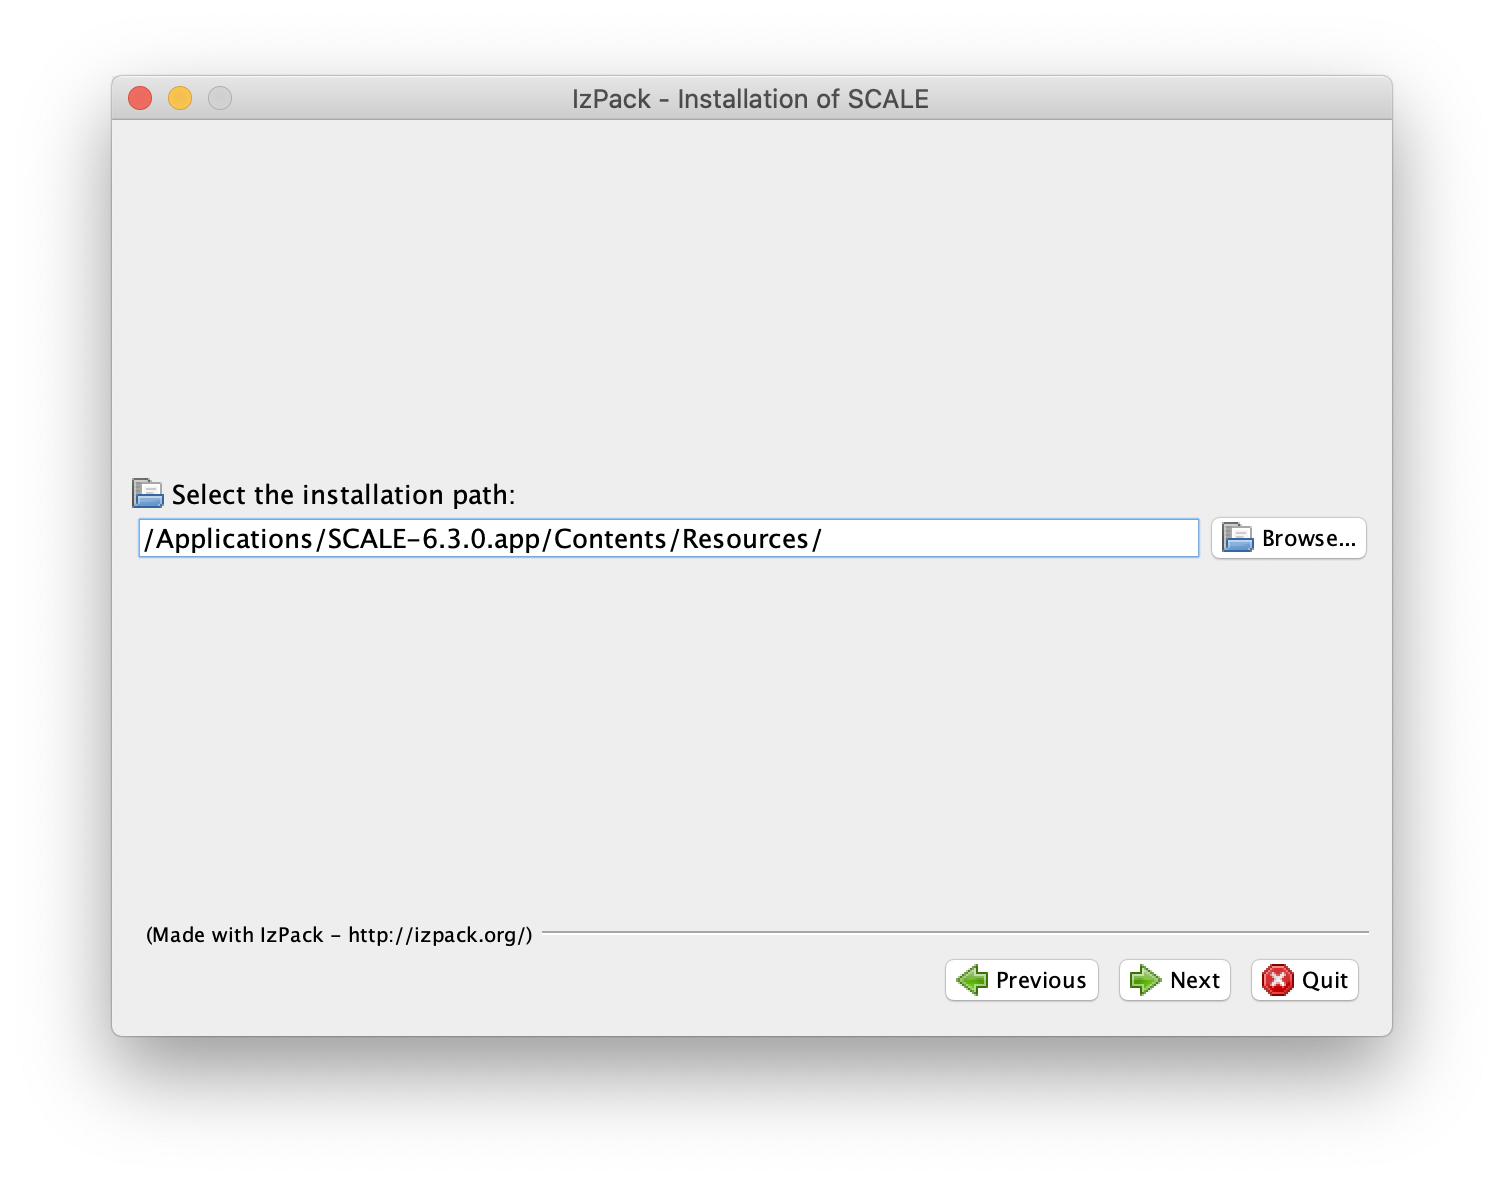
Fig. 12.2.10 Example setting a typical data installation path on Mac OS X.
For some systems, the installer will not be allowed to create a new directory. If you encounter a message like the one shown below, simply create the directory manually (e.g., using Windows Explorer), and then return to the installer and continue.
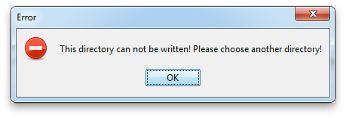
Fig. 12.2.11 Data installer directory creation error message.
In most cases, the installer will present a prompt to confirm the creation of a new directory; if that target directory is correct, then you can simply press OK. If the directory was manually created, the installer will notify you that it is about to overwrite any previous contents. Press Yes to continue.
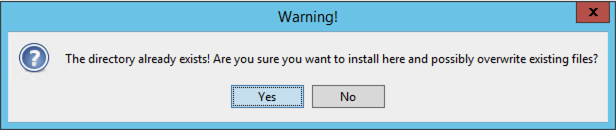
Fig. 12.2.12 Directory overwrite dialog.
The installer then presents a dialog for available data sets you may wish to install.
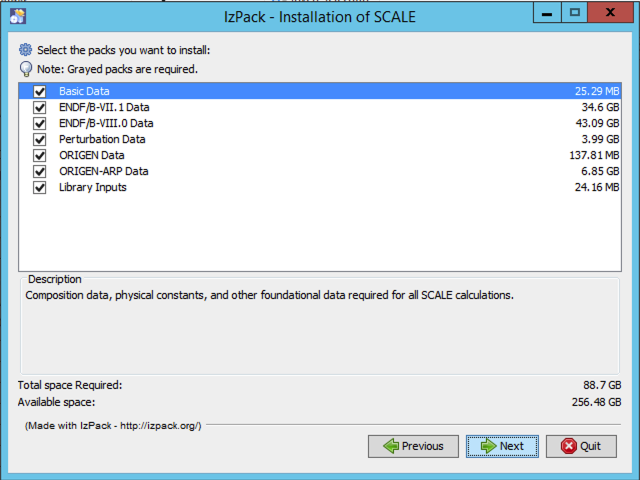
Fig. 12.2.13 Data selection dialog.
Please select the data needed to perform your desired SCALE calculations.
Basic Data — Composition data, physical constants, and other foundational data required for all SCALE calculations
ENDF/B-VII.1 Data — Nuclear Data from ENDF/B-VII.1 for CE and MG calculations, coupled n-gamma data from ENDF/B-VII.1 for MG calculations, and ENDF/B-VII.1 neutron covariance data (recommended for most calculations; required to run the SCALE sample problems)
ENDF/B-VIII.0 Data — Nuclear Data from ENDF/B-VIII.0 for CE and MG calculations
Perturbation data — 1,000 samples of data each for ENDF/B-VII.1 neutron covariance data, fission product yield covariance data, and radioactive decay covariance data (required for Sampler calculations perturbing nuclear data)
ORIGEN Data — Activation, depletion and decay data from ENDF/B-VII.1 and JEFF 3.0/A (required for activation, depletion and decay calculations)
ORIGEN reactor libraries — Pre-generated ORIGEN reactor libraries for many fuel types (required for spent fuel characterization and source terms calculations)
Next, the installer may ask for the location of the data .pak files that are unpacked during the installation process. Please direct the installer to the location of these data files, which are part of the SCALE distribution and may be on the distribution media or copied to a local directory as shown below.
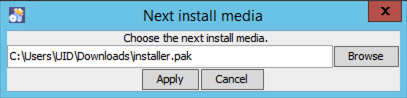
Fig. 12.2.14 Media selection dialog.
The installer will display the progress of the installation. If
installing from a DVD set, part way through the installation, you will
be prompted for installer.pak.1. Please insert the PAK.1 disk and click
Apply.
The installation from PAK.1 will complete and prompt for
installer.pak.2. Please insert the PAK.2 disk and click Apply.
PAK.2 will finish. Proceed with all DVDs or files in the delivery until you have completed your installation of SCALE 6.3 data.
12.3. Running SCALE
SCALE is run by using the Fulcrum user interface or by invoking the SCALE Runtime Environment, scalerte, from the command line. Note that this release does not include the previous interfaces GeeWiz or OrigenArp for running SCALE on Windows, as Fulcrum should be used instead. Additionally, previous shortcuts like runscale are not implemented.
12.3.1. Running SCALE from Fulcrum
The most convenient way to run SCALE from a desktop is by launching
Fulcrum. The Fulcrum executable is provided in the bin directory where
SCALE was installed (e.g., C:\SCALE-6.3.0\bin\Fulcrum.exe). Fulcrum
includes an online help document to assist users with its many features,
and it includes links to the user manual and primers.
12.3.1.1. Windows
For a Windows installation, launch Fulcrum from either the start menu or the shortcut provided in the SCALE-6.3.0 folder on the desktop.
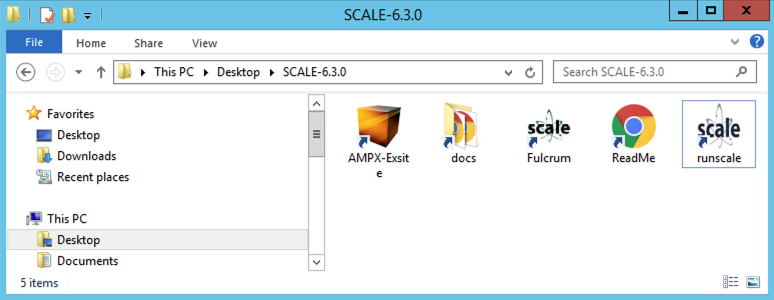
Fig. 12.3.1 Example Windows desktop SCALE shortcuts folder.
12.3.1.2. Linux
For a Linux installation, launch Fulcrum directly from the bin directory
of the SCALE installation (e.g., /scale/scale6.3.0/bin/Fulcrum).
12.3.1.3. Mac OS X
For a Mac installation, launch Fulcrum by executing the SCALE-6.3.0 app in the Applications directory.
12.3.2. Running SCALE from the Command Line
Using the command line, SCALE can be executed using the scalerte command from the bin directory inside the SCALE installation. Paths for each platform are shown below based on recommended installation directories. Your directory may differ based on the installation.
12.3.2.1. Windows
C:\\SCALE-6.3.0\bin\scalerte.exe
Note
Note that Norton Antivirus may require an exception for scalerte.exe on Windows to prevent the executable from being quarantined.
12.3.2.2. Linux
/scale/scale6.3.0/bin/scalerte
12.3.2.3. Mac
/Applications/SCALE-6.3.0.app/Contents/Resources/bin/scalerte
The SCALE runtime environment provides several command line options. The usage is as follows.
scalerte [options] inputfile(s) [options] [inputfile(s)]
Where inputfile(s) are one or more files or file patterns (test.inp, or test*.inp, etc.).
Where options are:
-a: Specify alias file.
-a path/to/aliasesfile
-f: Add hostname to output filename. Produces inputfile.hostname.out
-h: Print this information as a help message.
-I: Number of threads to use for MPI/OpenMP directives. -I 4
-m: Print information messages as SCALE executes.
-M: Specify a machine names file for SCALE parallel capabilities.
-M /path/to/machine/names/file
-n: Nice level on Nix systems, ignored on Windows. Default: -n 2
-N: Number of MPI processes to run. -N 20
-o: Overrides the default inputfile.out output name. The .out
extension is appended by scalerte, so there is no need to specify the
extension.
-o path/to/outputfile
Note
If the path/to/outputfile already exists, it will be deleted. If this option is specified while in stack mode (multiple input files), the value provided is prepended to the inputfile’s basename.
scalerte triton* -o myout results in output names myout.triton*.out
-z: Add date to the output filenames.
Produces output files in the form of
inputfile.yyyy.MM.ddThh.mm.ss.out
inputfile.yyyy.MM.ddThh.mm.ss.msg
inputfile.yyyy.MM.ddThh.mm.ss.etc
Where:
yyyy- is the year of execution.
MM- is the month of execution.
dd- is the day of execution.
hh- is the hour of execution.
mm- is the minute of execution.
ss- is the second of execution.
12.3.3. Example Invocation
For users familiar with previous invocations of the SCALE batch script,
this usage is no longer valid. The only valid entry point is scalerte.
Scalerte can be executed from anywhere with a fully qualified path such
as C:\SCALE-6.3.0\bin\scalerte or /scale/scale6.3.0/bin/scalerte, for
example.
Invoke SCALE on a single input file named HelloWorld.inp.
scalerte HelloWorld
or
scalerte HelloWorld.inp
Invoke SCALE on all input files patterned HelloWorld.inp.*
scalerte HelloWorld*.inp
Invoke SCALE on all input files patterned HelloWorld.inp* and print runtime messages to the console.
scalerte HelloWorld*.inp –m
Invoke SCALE on all input files patterned HelloWorld.inp* and include hostname and date/time in the output file’s name.
scalerte HelloWorld*.inp –fz
or
scalerte HelloWorld*.inp –f –z
Invoke SCALE on HelloWorld.inp and rename output to be MyHello.out.
scalerte HelloWorld –o MyHello
or
scalerte HelloWorld.inp –o MyHello
Invoke SCALE on all files patterned HelloWorld.inp* and rename output to be MyHelloWorld.out*.
Note
When SCALE is run in stack mode (multiple inputs), the output override is prepended to the input file’s name.
scalerte HelloWorld*.inp –o My
Invoke SCALE on HelloWorld.inp and keep the working directory.
scalerte HelloWorld.inp –r
Invoke SCALE on HelloWorld.inp and override and keep the working directory.
scalerte HelloWorld.inp –r –T myHelloWorldTempDir
Invoke SCALE on HelloWorld.inp and specify the number of threads to be 4.
scalerte HelloWorld.inp –I 4
12.3.4. SCALE Variables
This section describes the environment variable used within scalerte. These variables can be accessed through SCALE’s shell module to populate the working directory and/or to return SCALE-generated files that were not returned by scalerte.
Shell is used to perform system commands inside a problem before, after, or between explicitly called modules. It is usually used in SCALE to link a file from one name and place to another name and place, to delete files or directories, and to move or copy files. The use of shell in an input has the following form:
=shell
 *** System Commands ***
end
where System Commands are any UNIX or DOS command(s). This is particularly useful in tandem with the following environment variables when files not automatically returned are desired. The following example shell command copies the x16 file back alongside the output file.
=shell
cp x16 ${OUTBASENAME}.x16
end
Please note the syntax of Nix and Windows environment variables, ${VAR} and %VAR% respectively, are interchangeable, as scalerte and shell understand both.
Below are the seven primary locations known by scalerte:
The user’s home directory, HOME
*Nix systems, ${HOME}, /home/uid
*Windows, %HOME%, C:Usersuid
The directory of SCALE, SCALE
*Nix systems, ${SCALE}, location of user’s installation—typically
/scale/scale#*Windows, %SCALE%, location of user’s installation—typically C:SCALE#
The directory of the input file, INPDIR
*Nix systems, ${INPDIR}
*Windows, %INPDIR%
The directory of the output file, OUTDIR, which by default is the same as INPDIR, because the output file is written next to the input file
*Nix systems, ${OUTDIR}
*Windows, %OUTDIR%
The directory from which SCALE was invoked, the return directory, RTNDIR, which is the directory your console will return to upon completion
*Nix systems, ${RTNDIR}
*Windows, %RTNDIR%
The directory that contains the SCALE data, DATA
*Nix systems, ${DATA}
*Windows, %DATA%
The working directory for a given input file, TMPDIR, or shorthand TMP
*Nix systems, ${TMPDIR}, ${TMP}
*Windows, %TMPDIR%, %TMP%
There are several secondary locations in the SCALE directory tree. These are as follows:
The directory containing the platform-specific compiled programs, PGMDIR, or legacy PGM_DIR:
*Nix systems, ${PGMDIR}, ${PGM_DIR}
*Windows, %PGMDIR%, %PGM_DIR%
Lastly, there are several environment variables provided for convenience and/or that are associated with output data that can be useful.
The directory containing the ORIGEN data files, ORIGENDIR
*Nix systems, ${ORIGENDIR}
*Windows, %ORIGENDIR%
The base name of the input file, BASENAME, which is the name of the input file without both absolute path and extension
*Nix systems, ${BASENAME}, or ${CASE_NAME}
*Windows, %BASENAME%, or %CASE_NAME%
The base name of the output file, OUTBASENAME, or legacy CASE_NAME, which is the name of the output file without both absolute path and extension
*Nix systems, ${OUTBASENAME}, or ${CASE_NAME}
*Windows, %OUTBASENAME%, or %CASE_NAME%
The base name of the output file, OUTBASE, which is the absolute name of the output file without file extension
*Nix systems, ${OUTBASE}
*Windows, %OUTBASE%
The absolute path to the input file, INPUTFILE
*Nix systems, ${INPUTFILE}
*Windows, %INPUTFILE%.
The absolute path to the output file, OUTFILE.
*Nix systems, ${OUTFILE}
*Windows, %OUTFILE%
The directory containing USLSTATS output, USLDIR (If USLSTATS data were output, then these data would be located in OUTDIROUTBASENAME.uslstats directory.)
*Nix systems, ${USLDIR}
*Windows, %USLDIR%
The directory containing CENTRM output, CENTRMDIR (If CENTRM data were output, then these data would be located in OUTDIROUTBASENAME.centrmfiles directory.)
*Nix systems, $CENTRMDIR
*Windows, %CENTRMDIR%
The directory containing XSDRNPM output, XSDRNDIR (If XSDRNPM data were output, then these data would be located in OUTDIROUTBASENAME.xsdrnfiles directory.)
*Nix systems, $XSDRNDIR
*Windows, %XSDRNDIR%
The platform-specific file separator, FS, which is either backslash () on Windows, or forward slash (/) on Nix systems
*Nix systems, ${FS}
*Windows, %FS%
12.3.5. Parallel Execution Capability
SCALE 6.3 contains four modules and sequences that have distributed memory (MPI) parallelism: KENO V.a, KENO-VI, Sampler, and ORIGAMI. However, the binary executable files distributed with SCALE do not have MPI enabled. To run one of these codes in parallel, the user must first build SCALE with MPI enabled (see build instructions in this guide). Control modules like CSAS6, T6-DEPL, and TSUNAMI-3D-K6 automatically initiate the parallel version of KENO–VI in a parallel SCALE build if the user provides the required arguments as summarized below. When running a standalone code in parallel (such as KENO-VI), a “%” prefix is required on the sequence specification record in the input file (e.g., =%keno-vi). Parallel code execution is available on Linux and Mac systems but is not available on Windows PCs.
The executable binary code distributed with SCALE only enables serial calculations. If MPI parallelism is desired, then the source code must be compiled with MPI support enabled for the platform and configuration where the code will be executed in parallel. The SCALE build configuration sets some variables (SCALEMPI, SCALECMDS, and MPIRUN), depending on the third-party MPI package for the SCALE driver, which prepares two different execution environments with these variable sets for both serial and parallel code execution.
Executing SCALE in parallel is initiated by scalerte when the user
provides the necessary MPI command line arguments with the two options,
–N and –M, which specify the number of MPI processes and machine
names, respectively. To run an input called HelloWorld.inp from an MPI
build on SCALE on two nodes specified in the machine file mach, use
the following command:
scalerte –N 2 –M mach HelloWorld.inp
With these options, scalerte sets NTASKS and MACHINEFILE variables, depending on the user request, and passes them to the SCALE driver. During the parallel code execution process, the driver invokes the MPIRUN wrapper to run the parallel functional module across MPI processes. An environment variable MPIARGS is available for the driver to pass some user-defined MPI options to MPIRUN wrapper.
12.4. SCALE Sample Problems
The SCALE sample problems are designed by the SCALE developers to verify the installation and functionality of SCALE relative to the expected results. Users are urged to run the sample problems to verify the proper installation of SCALE. ORNL has provided a set of reference results from each sample problem against which the results of each installation can be compared.
The sample problems are most easily run through Fulcrum by selecting Run SCALE Verification from the Run menu on the main menu bar. This will run all of the sample problems sequentially and will present any differences from the ORNL-generated results.
The SCALE runtime environment, scalerte, which is described in the subsequent section, has a built-in scripting interface to allow for invocation of several groupings of sample problems, including individual problems, problems for a specific module, subsets of modules, or all samples. The sample problems will print a message indicating the sample problem currently running, followed by the differences between ORNL-generated results and the newly generated results for the sample problem(s). Note that there may be up to an hour’s delay before messages are printed to the console. The final message will indicate that the “Process finished with a 0 return code … .” If no differences or minimal differences are noted for a particular sample problem, then SCALE has been properly installed for the tested functionality.
The set of sample problems is located in the samples directory of the SCALE installation.
To run all sample problems, execute the following command:
scalerte @samples/samples
To invoke sample problems for a particular module or sequence, use
scalerte @samples/samples modulename
where modulename is the name of the module or sequence to test, e.g., centrm.
To invoke a single sample problem, do the following.
scalerte @samples/samples problemname
where problemname is the name of the specific sample problem to test, e.g.,
centrm-pwr.inp.
The above modulename and problemname examples can be combined and repeated to exercise sets of sample problems of interest. For example, run csas and origen sequence sample problems in addition to the centrm-pwr.inp sample.
scalerte @samples/samples csas centrm-pwr.inp origen
As the sample problems execute, feedback will be provided to the screen such as that shown in the example below. If no differences or only small differences are reported between the ORNL results and the currently generated results for each sample, then SCALE has been properly installed and configured for the tested functionality.
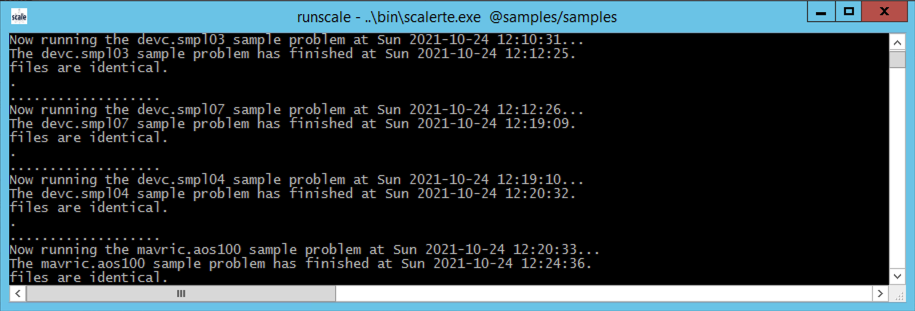
Fig. 12.4.1 Sample problem output messages.
For any problems or questions, please contact scalehelp@ornl.gov.
12.5. Build Instructions
These instructions are only for those who wish to recompile their SCALE binaries. If you are running SCALE using the precompiled binary executable files distributed with SCALE, then please disregard this section.
For SCALE 6.3 and subsequent updates, the build configuration has been completely renewed relative to all previous versions. The SCALE build is now based on CMake from KitWare, which supports a consistent experience on Linux, Mac, and Windows.
12.5.1. Overview
There are four main steps to create and install SCALE binaries
Install compilers and third-party libraries (TPLs).
Configure CMake to generate a native build tree.
Compile all executables and libraries.
Install to deploy all executables into a configuration ready for execution.
12.5.2. Required Resources
SCALE requires the following programs in order to compile:
Fortran Compiler
Windows – Intel Fortran compiler 15.0
Linux - Intel Fortran compiler 14.1+/GNU gfortran 4.8.3+ compiler
Mac OS – GNU gfortran 4.8.5+ compiler
C/C++ Compiler
Windows – Intel C/C++ compiler 15.0.=
Linux – Intel C/C++ compiler 14.1+ / GNU g++/gcc 4.8.3+ compiler
Mac OS – GNU g++/gcc 4.8.5+ compiler
CMake 3.13+ - Platform independent build configuration for Linux, Darwin, and Windows
SCALE requires the following libraries, which are not distributed with SCALE:
LAPACK libraries:module
lapack
blas
You must modify the LAPACK variable in configure_scale_gnu.sh to point to your installation of LAPACK prior to configuration.
To enable MPI on Linux, one of the following optional packages is required.
OpenMPI-2.1.6 and earlier
MPICH 3.2 or 3.3
MPI is not supported on macOS or Windows. Based on experience so far, using OpenMPI results in faster parallel computations versus MPICH.
12.5.3. Mac OSX Resources
Mac OSX does not come preloaded with the necessary resources for compiling SCALE. Macports provides a simple mechanism for retrieving almost all of the required resources necessary to compile SCALE on a Mac. This process has only been tested on Mac OSX 11 (Big Sur)
You can download the latest macports from http://www.macports.org/. You will need XCode (free from the App Store) with commandline tools installed for macports to work.
Important
You will need administrative privileges to install macports and the necessary resources.
Please see macports instructions for xcode installation/requirements. http://guide.macports.org/#installing.xcode
After installing these resources, a new shell session is necessary to access the new tools.
- ..note:: If your rsync port is blocked by the firewall (as is the case at
ORNL), you may synchronize over http by updating your /opt/local/etc/macports/sources.conf file to change the line:
rsync://rsync.macports.org/release/tarballs/ports.tar [default]
to
http://www.macports.org/files/ports.tar.gz [default]
The following commands will install all necessary resources.
If the rsync port is blocked, use
$> sudo port –d sync
If the rsync port is open, use
$>sudo port selfupdate
Regardless of rsync status, execute the following commands:
$>sudo port install gcc
$>sudo port install qt5
These commands upgrade the default compilers to the latest GCC compilers and the latest version of Qt5. Mac Ports also provides older versions of the compilers and Qt5 in case they are needed. However SCALE 6.3.0 requires on a version of GCC newer than 4.8 and a version of Qt5 newer than 5.11.
12.6. CMake Configuration
CMakeLists.txt files can be found throughout SCALE. From the SCALE root directory, these CMakeLists.txt files create a tree of included directories called the SOURCE TREE. Namely, the source directories are
packages/AmpxLib

XSProc

ScaleLib

etc.
To configure a build, call cmake on the root CMakeLists.txt file, namely
scale_dir/CMakeLists.txt. CMake takes your source tree and creates a
BUILD TREE. The build tree contains or will contain the build
configuration, the Make or NMake files, and all compilation output:
object files, archive libraries, and binary executables.
SCALE requires several TPLs, specifically, QT and Lapack. These TPLs must be specified at the time of configuration. For ease of use, configuration scripts for every supported platform are available in the scripts directory of the source code. These scripts describe the necessary variables to define. A user’s modifications to these scripts should be limited to the path to the root directories for the TPLs.
12.6.1. Recommended Configuration Procedure
After unpacking the source code, navigate to the root scale directory (<SCALE_SRC_ROOT>. You will see CMakeLists.txt, PackagesList.cmake, and CTestConfig.cmake. This is the root of the source tree, to which you will point CMake. This example demonstrates creating build trees for multiple configurations for your working copy.
12.7. Linux and Mac Configuration
Make Build Directory
mkdir build

mkdir –p build/intel \**this could be any directory

or

mkdir –p build/gcc
CMake Initialization
Copy the cmake script from the scripts directory to your build directory. Update the cmake script with your TPL specifications.
Serial SCALE (without MPI support)
cp <SCALE_SRC_ROOT>/script/configure_scale_gnu.sh
build/gcc

chmod u+x build/gcc/configure_scale_gnu.sh
Parallel SCALE (with MPI support)
cp script/configure_scale_mpi.sh build/gcc

chmod u+x build/gcc/configure_scale_mpi.sh
Create Your Configuration
Create your configuration by pointing this script at the source tree root
cd build/gcc
Serial SCALE (without MPI support)
./configure_scale_gnu.sh ../..
Parallel SCALE (with MPI support)
./configure_scale_mpi.sh ../..
/* Configuration Output…. */
**If you add or remove source files from the source tree, CMake will NOT see these modifications unless a CMake file is modified (CMakeLists.txt,PackagesList.cmake,etc…).
CMake will re-evaluate the entire source tree when any CMake file has been modified. If CMake does not pick up the addition/removal of sources files, then the easiest way to update the build tree is to “touch” any CMake file in the source tree.
12.7.1. Windows Configuration
Instructions are not documented here. Please contact scalehelp@ornl.gov for assistance.
12.7.2. Compilation
Every library and executable is a TARGET. Calling make on Linux and Mac
and nmake on Windows from the root of your build tree
(<SCALE_SRC_ROOT>/build/gcc from the previous example) will build ALL
targets. There are two options when building specific targets. For
example, MavricUtilities contains a number of executables: mtadder,
mtaverager, and so on.
You may invoke make mtadder to build mtadder alone. Alternatively, you
can build it from build/gcc, cd packages/MavricUtilities and make to
compile ALL targets in mavricUtilities.
12.7.3. Compilation Flags
You may modify CMAKE_Fortran_FLAGS, CMAKE_C_FLAGS, and CMAKE_CXX_FLAGS
on the cmake command invocation line.
12.7.4. Installation
CMake provides the install target, which installs all binaries from the
current directory down. For example, make install' from build/gcc will
install any targets, which would install aim, mavric, mtadder,
mtaverager, etc., while cd packages/Mavric and make install will only
install targets declared in the Mavric directory.
***Note that make install re-evaluates the build for all dependencies.
For example, package A depends on packages B and D. Package D depends on
package E. Therefore, make install for package A would result in
packages E, D, and B being re-evaluated and rebuilt if necessary. Thus,
if you know you want to build and install, you can save time building by
simply doing a make install. An alternative is make install/fast, which
will skip…..